

Reliable Digital Thermal Mixer for Clinical and Research Labs
$2,199.00 USD
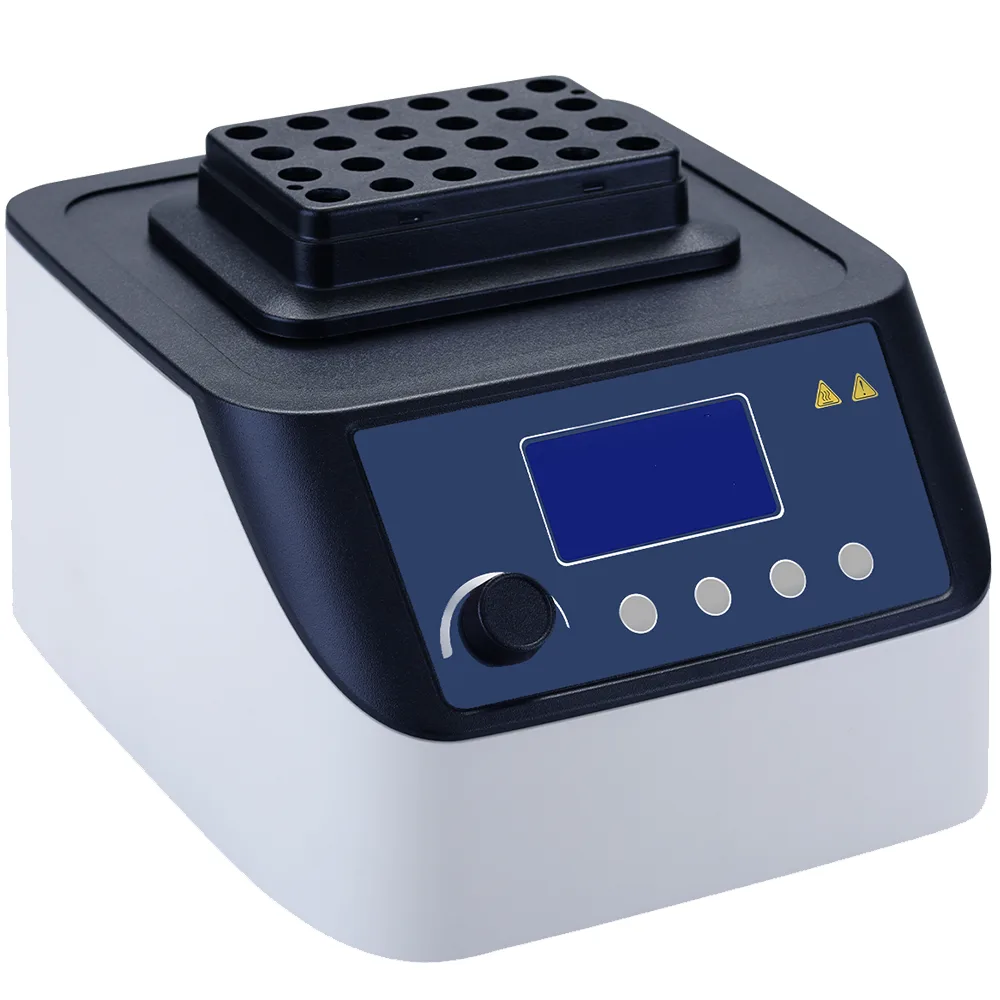
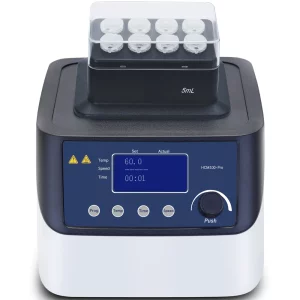
This oven controlled oscillator is designed for precise temperature control and efficient mixing. Its magnetic design allows for quick heating block changes, while its insulated cover effectively locks in heat and prevents contamination, making experiments both convenient and reliable. It supports custom program editing and storage, making it suitable for a variety of scenarios, including education, clinical practice, and scientific research. Its oscillation function ensures even sample mixing, and a variety of heating modules are available for flexible selection. From core performance to practical details, it comprehensively improves experimental efficiency and result accuracy, making it an ideal choice for laboratories.
Description
Specification
| Ttype | HCM100-Pro |
| Function | Heating, cooling, shaking |
| Size | 7.87 × 9.25 × 4.72 inches |
| Weight | 7.3kg |
| Temperature control range [℃] | Room temperature -15~100 |
| Temperature setting range [℃] | 0-100 |
| Temperature control accuracy [℃] | ±0.5 |
| Temperature display accuracy [℃] | ±0.5 |
| Time setting range | 0-99h59min |
| Maximum heating rate | 5.5℃/min |
| Maximum cooling rate | 5 °C/min (100 °C – room temperature)
0.5 °C/min (below room temperature) |
| Speed range [rpm] | 200-1500 |
| power | 200W |
Packing List
1. Main unit
2. Power cord
3. Heating module (select one as needed)
4. Instruction manual
Product Features
Custom Programs
The oven controlled oscillator’s custom program function allows you to freely edit and save up to 9 programs. You can preset parameters such as temperature, shaking speed, and run time for commonly used timed incubation experiments, allowing you to quickly and easily perform experiments, improving operational efficiency and consistency of results.
Precise Temperature Control
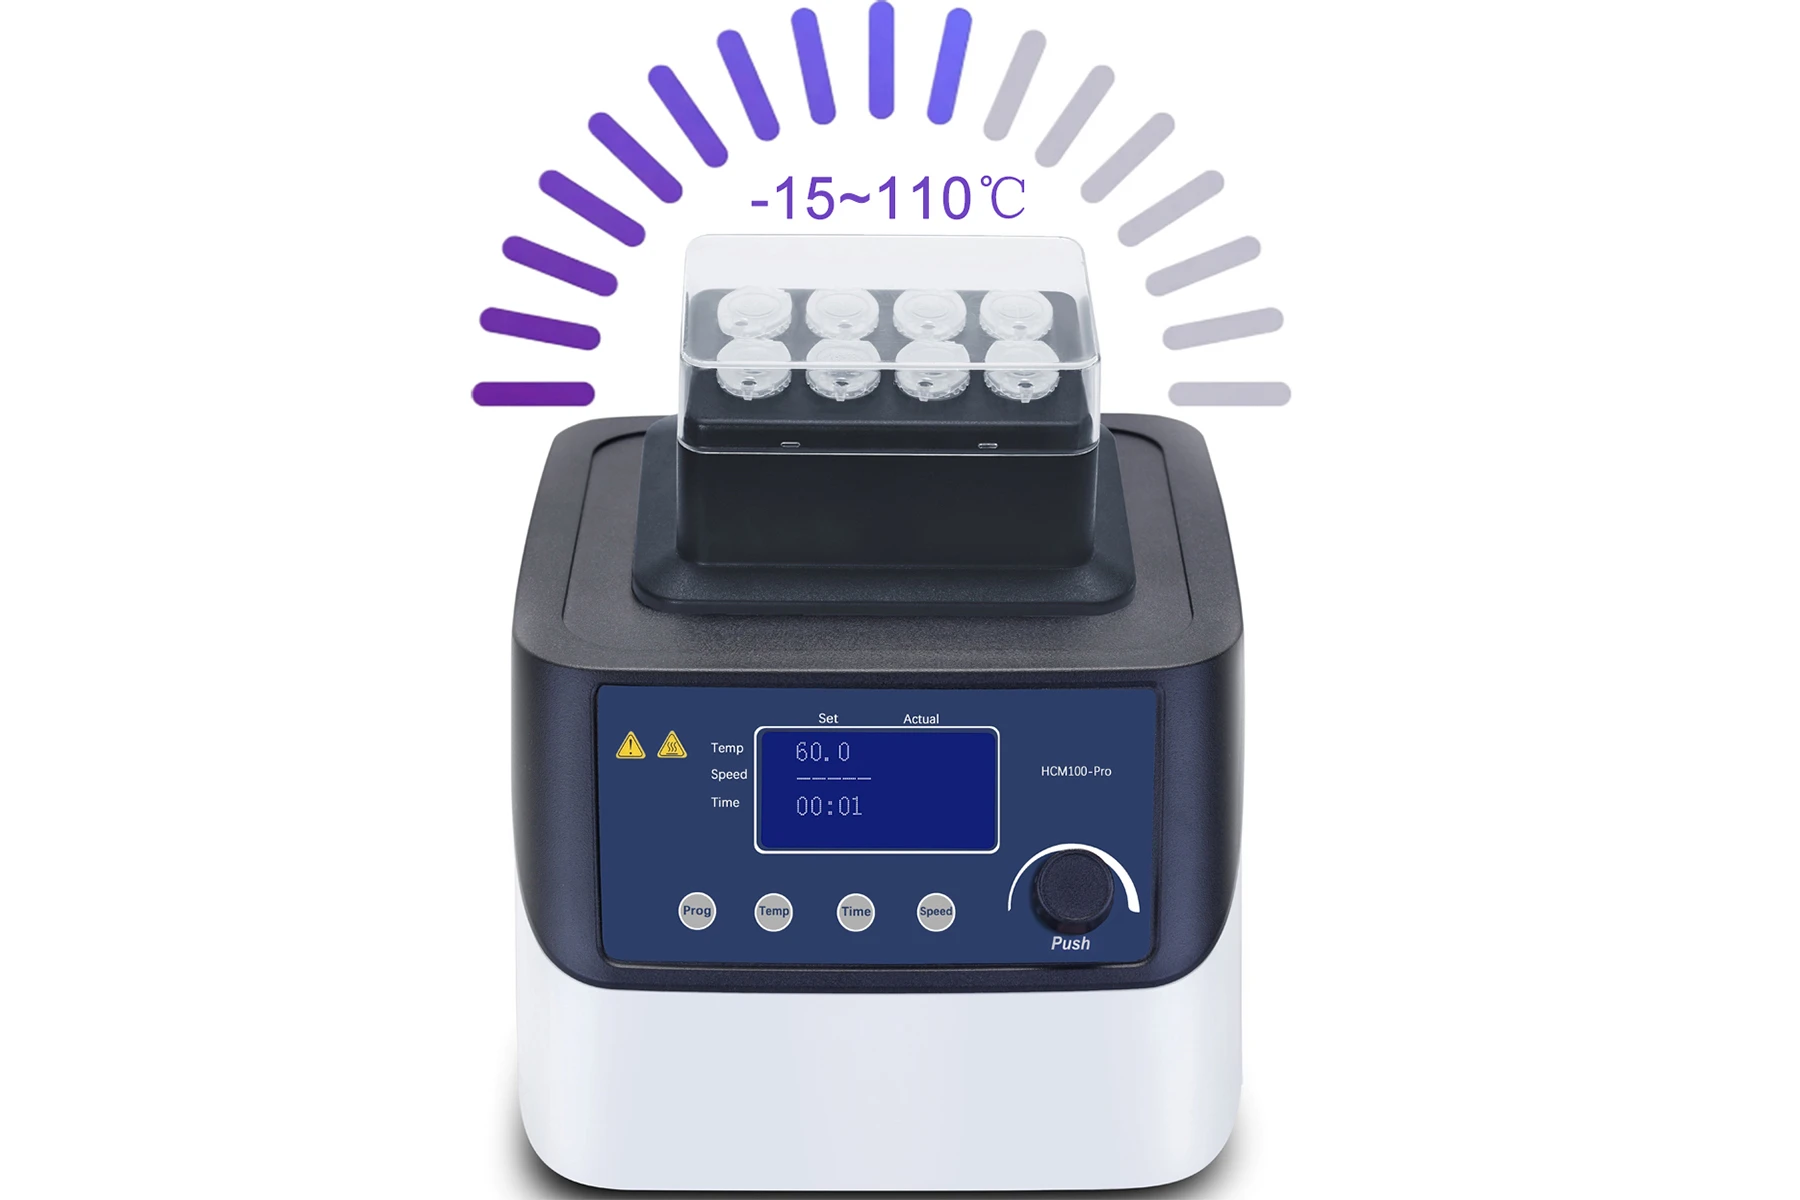
The oven controlled oscillator achieves precise temperature control within a wide temperature range of -15~110℃, which can meet the stringent temperature requirements of different experiments, reduce experimental result errors caused by temperature deviation, improve operational reliability, and adapt to sample processing work with strict temperature requirements in multiple scenarios.
Support Three-point Temperature Calibration
The three-point temperature calibration function precisely calibrates the instrument at different temperature points (such as low temperature, medium temperature, and high temperature) to ensure the accuracy and stability of temperature control within the entire temperature range, reduce the impact of temperature deviation on experimental reactions, and ensure the reliability of experimental results.
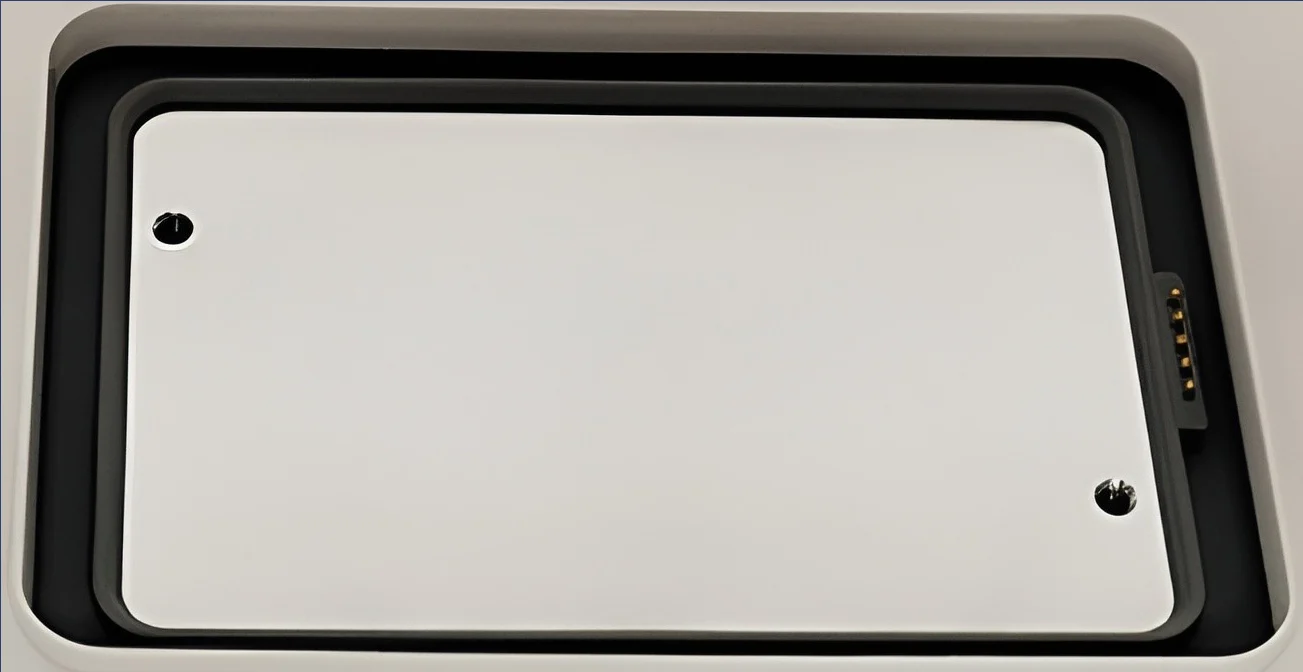
Magnetic Adsorption Function
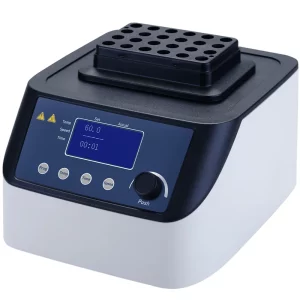
The magnetic adsorption function requires no tools, allowing for quick positioning and removal of the heating module using magnetic force. This simplifies the operation process, saves replacement time, improves experimental preparation efficiency, and reduces operational difficulty, making module replacement more convenient and efficient, suitable for diverse experimental scenarios requiring frequent module changes.
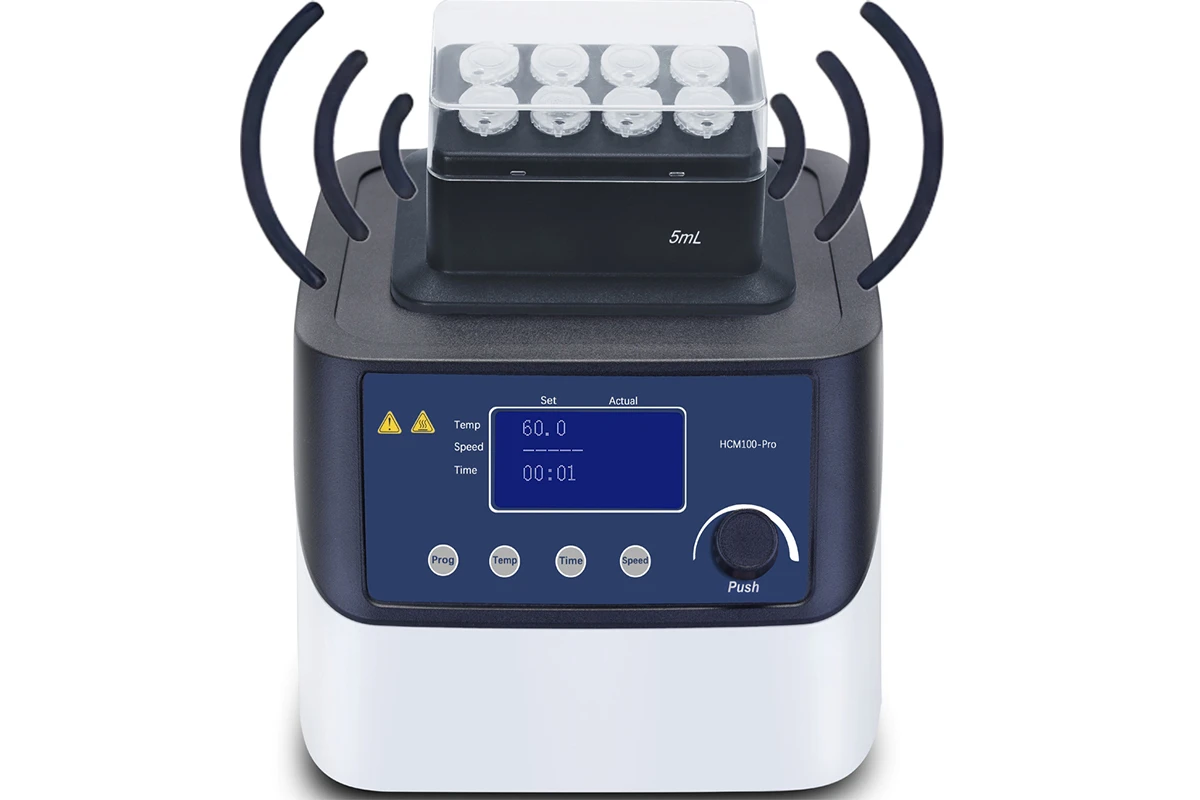
Oscillation Function
The oscillation function of the oven controlled oscillator drives the liquid in the sample container to vortex or stir through the reciprocating or rotating motion of the tray. The oscillation speed can be adjusted within the range of 200-1500rpm, which has excellent mixing effect, shortens reaction time and improves experimental efficiency.
Insulation Cover
The main function is to insulate heat, reduce the heat loss of the heating module to the surrounding environment, improve the thermal energy utilization efficiency of the equipment, and help maintain the temperature stability of the heating module.
Application Areas

Education
In teaching experiments, the constant temperature mixer can intuitively demonstrate chemical reactions, solution mixing and other processes through precise temperature control and mixing functions, helping students understand the impact of temperature on reactions and the importance of sample uniformity, simplifying experimental operations and improving teaching efficiency.

Scientific Research Fields
In scientific research experiments, its wide temperature range control, customizable programs, and adaptability to a variety of consumables can meet the personalized temperature and mixing requirements of different experiments such as molecular biology (such as nucleic acid extraction) and chemical synthesis, support multiple sets of experiments in parallel, and accelerate the research process.

Biomedicine
In drug development and vaccine preparation, constant temperature mixers can provide a stable temperature environment and uniform mixing effect for enzyme reactions, cell culture and other processes, ensuring reagent activity and reaction efficiency, and assisting in the development and production of biopharmaceutical products.

Clinical Testing
In clinical testing, constant temperature mixers are used for the pretreatment of samples such as blood and urine. By stabilizing temperature control and oscillating mixing, they ensure uniform sample composition and consistent reaction conditions, reduce testing errors, and provide a reliable sample basis for disease diagnosis.
Product Details
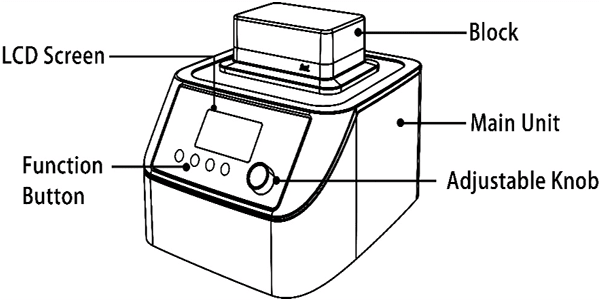
| Item | Description |
| Block | Changeable unit, suit for different tubes |
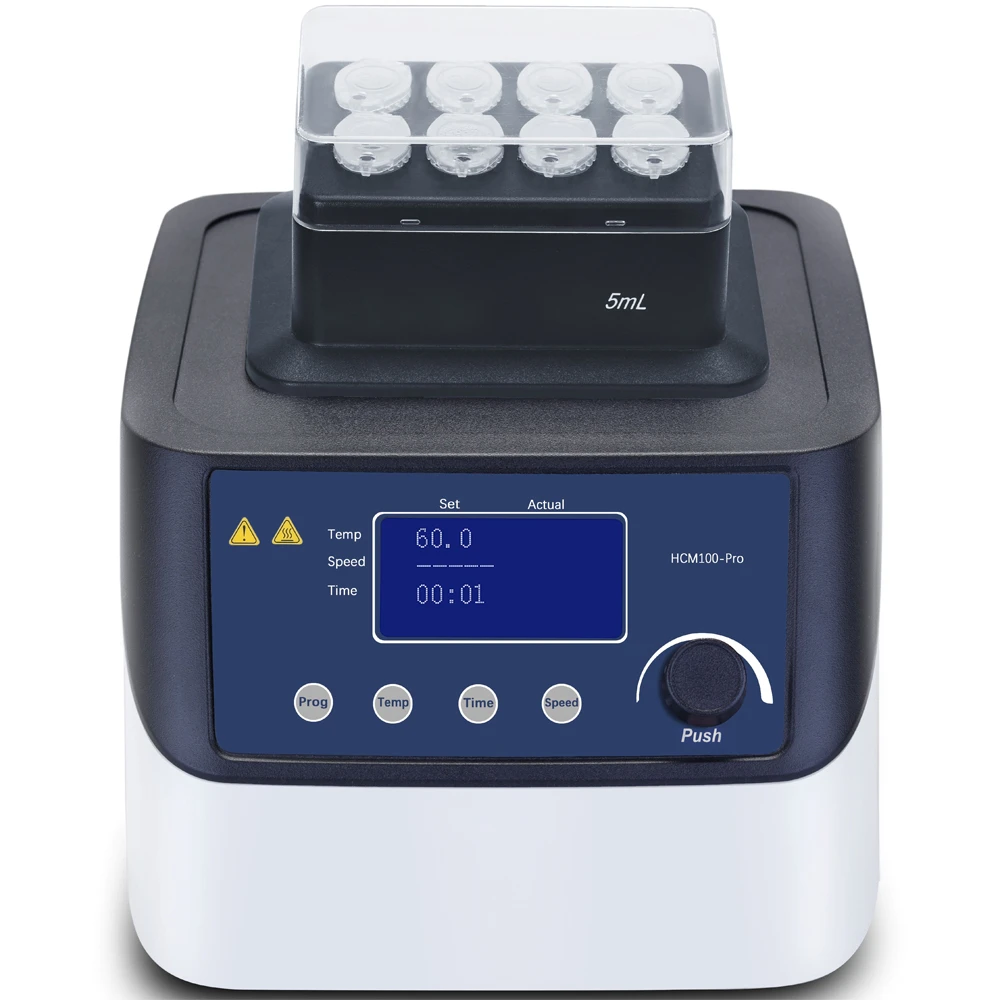
| LCD Screen | Display the setting and actual parameters |
| Function Button | Switch the input parameters or programming |
| Adjustable Knob | At parameter setting state, rotate this knob can input values; After setting, push it to start work. At working state, short push to pause; Long push to stop working |
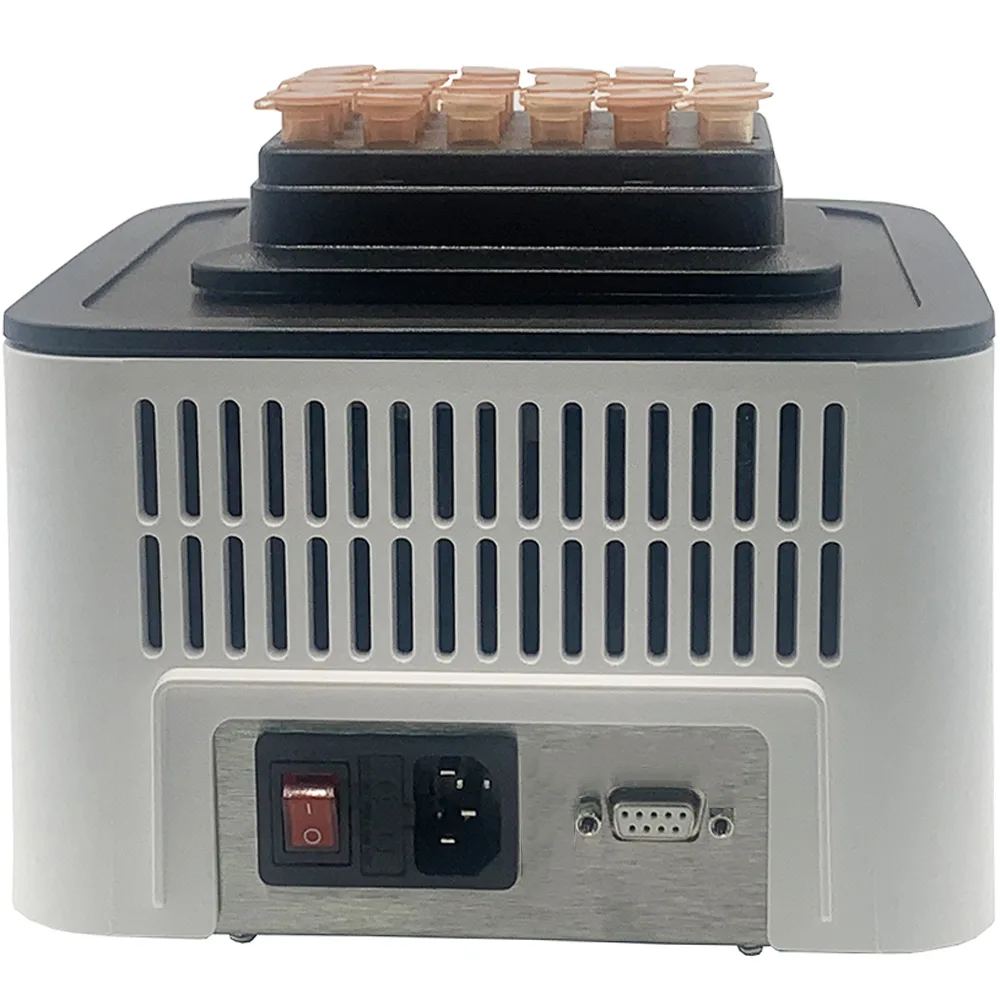
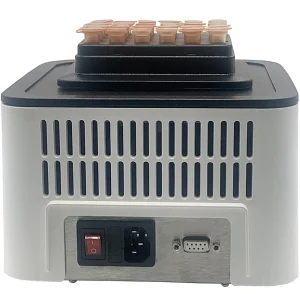
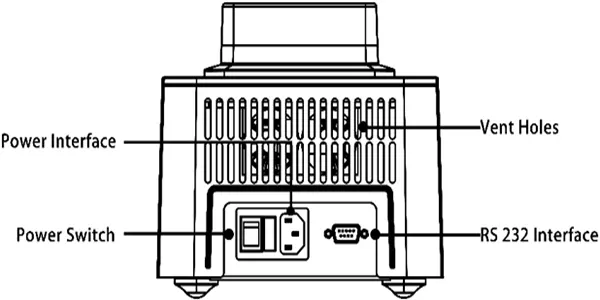
| RS232 Interface | Used for factory internal temperature calibration |
| Power Interface | Connect the power cable |
| Power Switch | Power on/off |
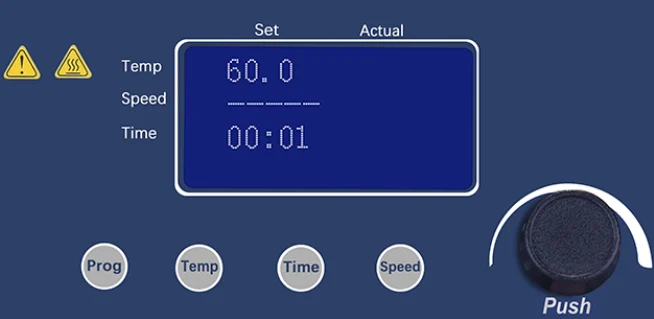
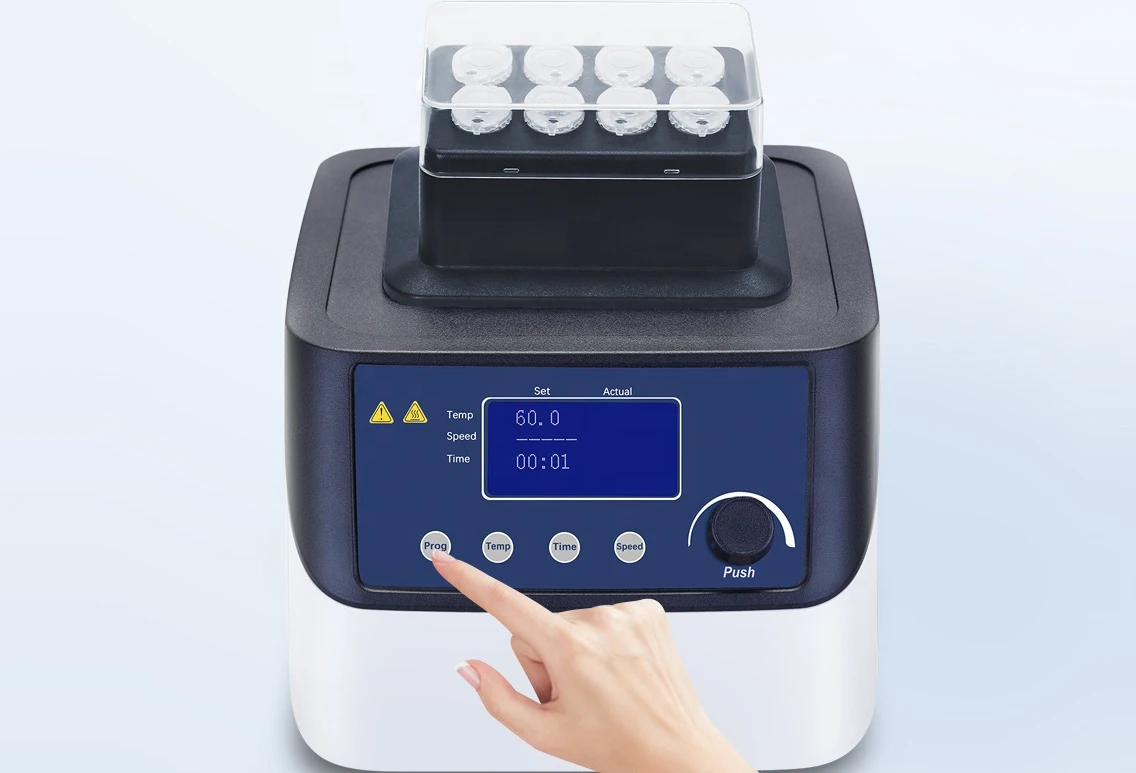
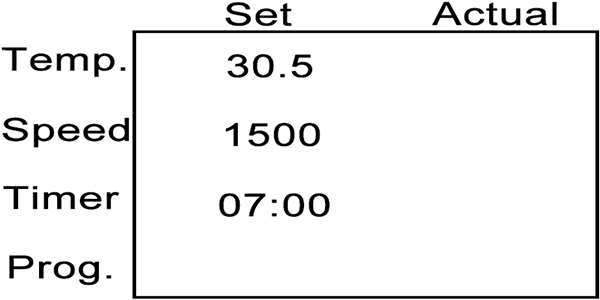
Control Panel
| Items | Description |
| Set | Display the setting parameters |
| Actual | Display the actual parameters |
| Prog | Program button, used for programming |
| Temp | Temperature setting button,when press this button, the temperature characters of the setting area are flashing. |
| Time | Time setting button, when press this button, the time characters of the setting area are flashing. In timed working mode, the time shows the countdown time. In continuous working mode, the time show running time. |
| Speed | Mixing speed setting button, when press this button, the speed characters of the setting area are flashing |
The knob and TFT display make operation and information presentation more efficient. The knob can quickly adjust parameters such as temperature, speed, time, etc., accurately and conveniently; the TFT screen clearly displays real-time data and setting information. The combination of the two simplifies the operation process, improves operational efficiency and experience, and helps experiments proceed smoothly.
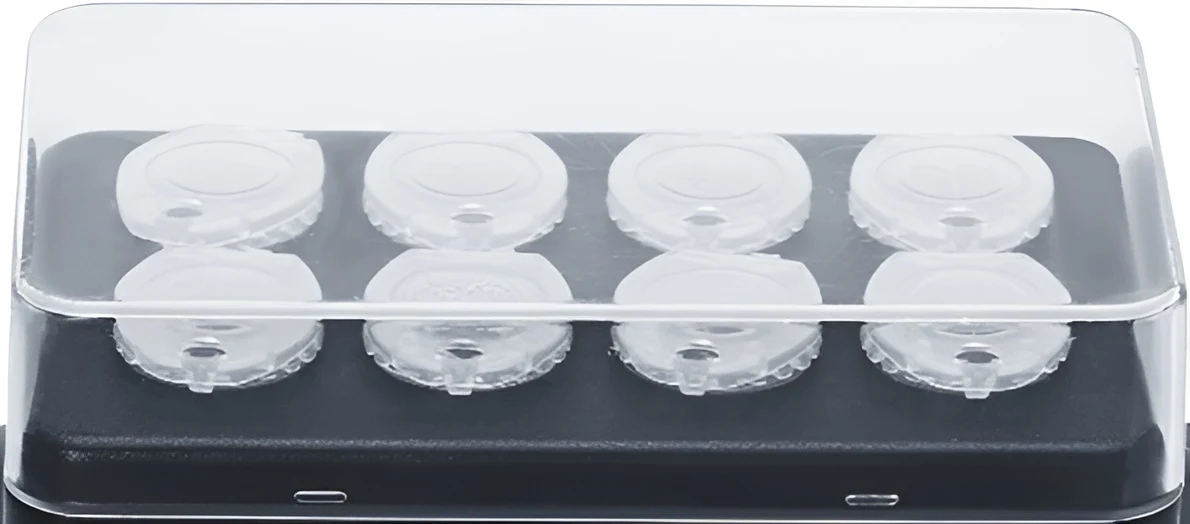
Heating Module

Small Capacity Centrifuge Tube Module
| capacity | 0.5ml×24 | 1.5ml×24色谱瓶 | 1.5ml×24 | 2ml×24 |
| speed | 1500rpm | 1500rpm | 1500rpm | 1500rpm |
| Aperture × depth | 8.1×26mm | 12×20.5mm | 10.9×30.8mm | 10.9×30.8mm |
Suitable for 0.5-2mL small-size centrifuge tubes, used for small-volume samples (such as nucleic acid extraction, enzyme reactions)
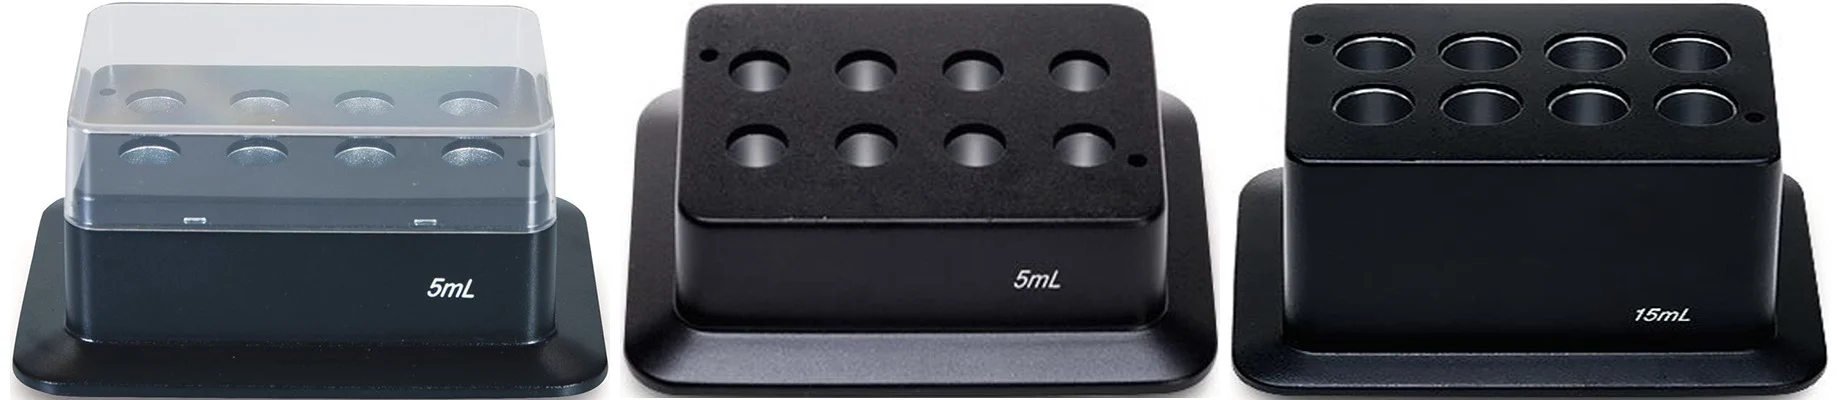
Medium Capacity Centrifuge Tube Module
| capacity | 5ml×8(Cone bottom) | 5ml×8(Round bottom) | 15ml×8 |
| speed | 1400rpm | 1500rpm | 800rpm |
| Aperture × depth | 17×51.5mm | 13.6×42mm | 16.9×80mm |
Suitable for 5-15mL centrifuge tubes, reagent preparation, sample pretreatment, etc.
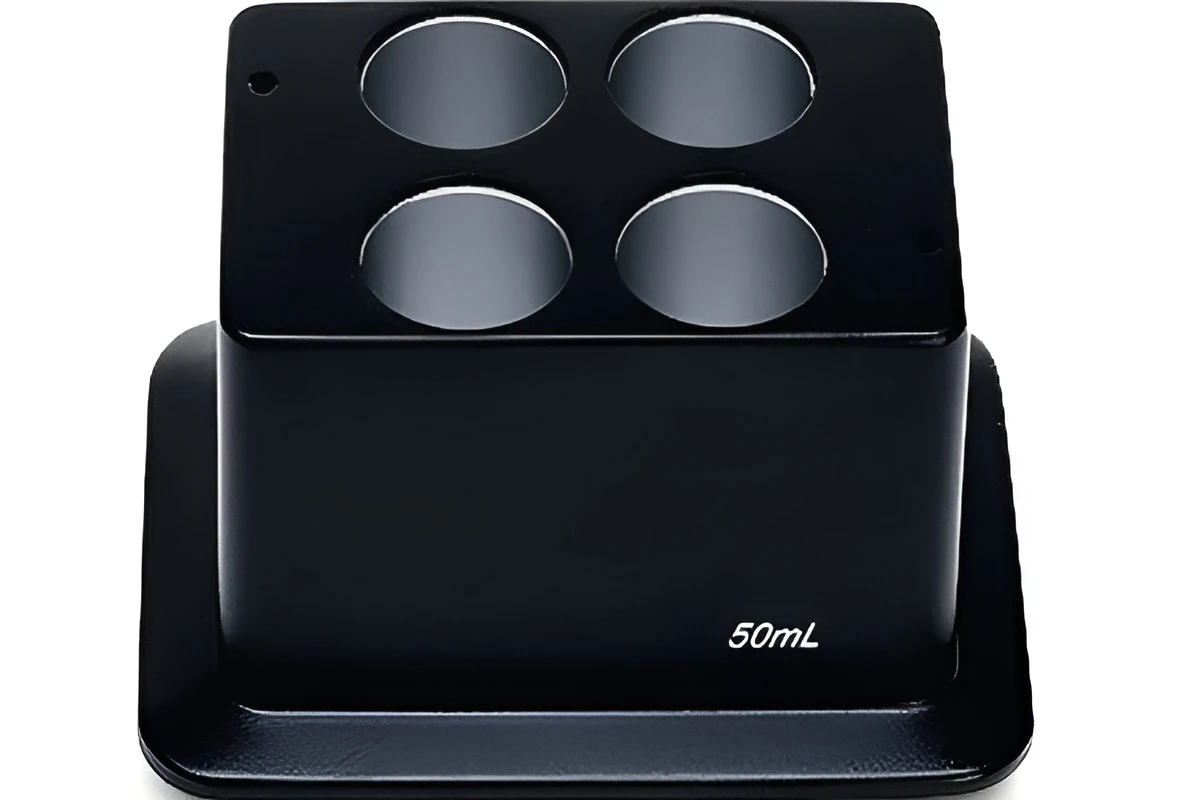
Large Capacity Centrifuge Tube Module
| capacity | 50ml×4 |
| speed | 600rpm |
| Aperture × depth | 29.6×80mm |
Suitable for 50mL centrifuge tubes, suitable for large volume samples (such as cell culture, solution mixing)

PCR Dedicated Module
| capacity | 0.2ml×8 PCR strips or 0.2ml×96 PCR microplates |
| speed | 1500rpm |
| Aperture × depth | 5.7×13.2mm |
Matching PCR consumables (0.2mL tubes/plates) to serve molecular biology experiments
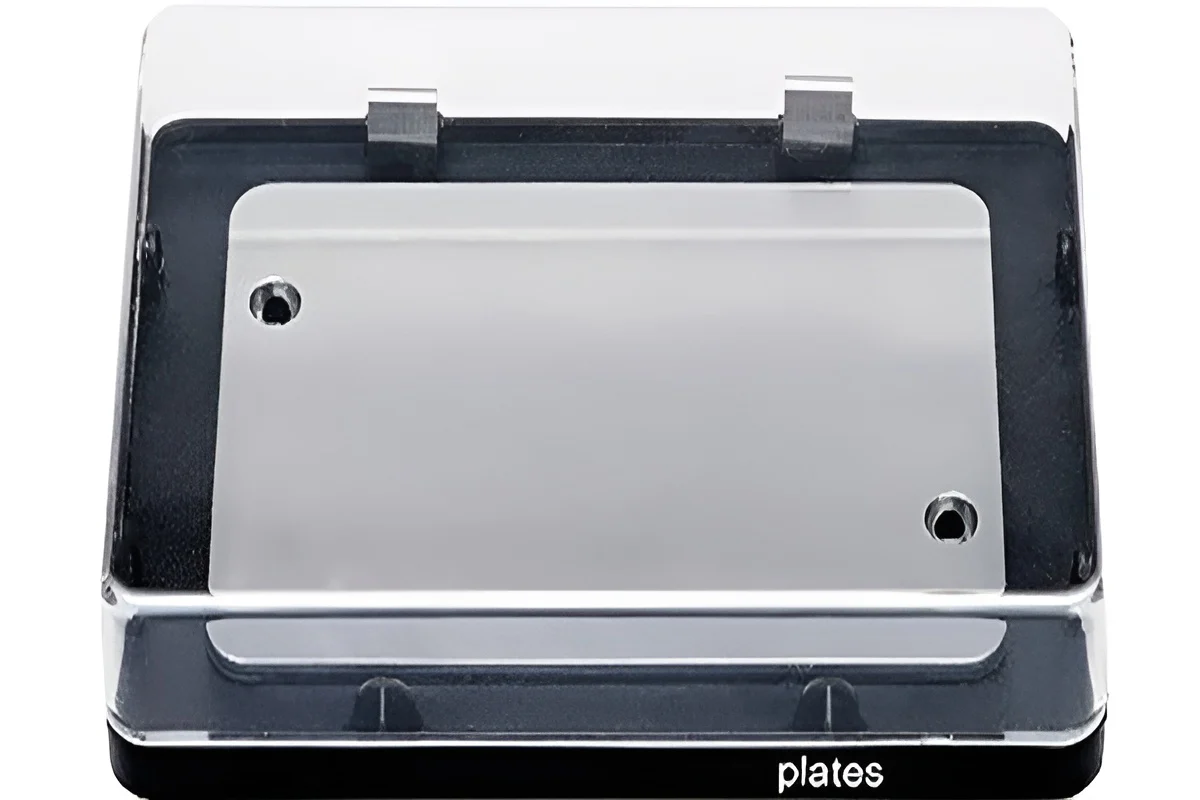
ELISA Microplate
| capacity | ELISA microplate |
| speed | 1500rpm |
| Aperture × depth | 127×85mm |
Designed specifically for ELISA experiments and adapted to immunoassay procedures
How to perform temperature calibration?
Inject silicon oil into the hole in the center of the heating block. Place the thermometer probe in the oil filled hole.
1. Switch power ON the instrument,Press both the Prog and Temp buttons at the same time to enter into calibration mode while self-checking only. (Please note that the instrument cannot enter into calibration mode if the self-check is complete.)
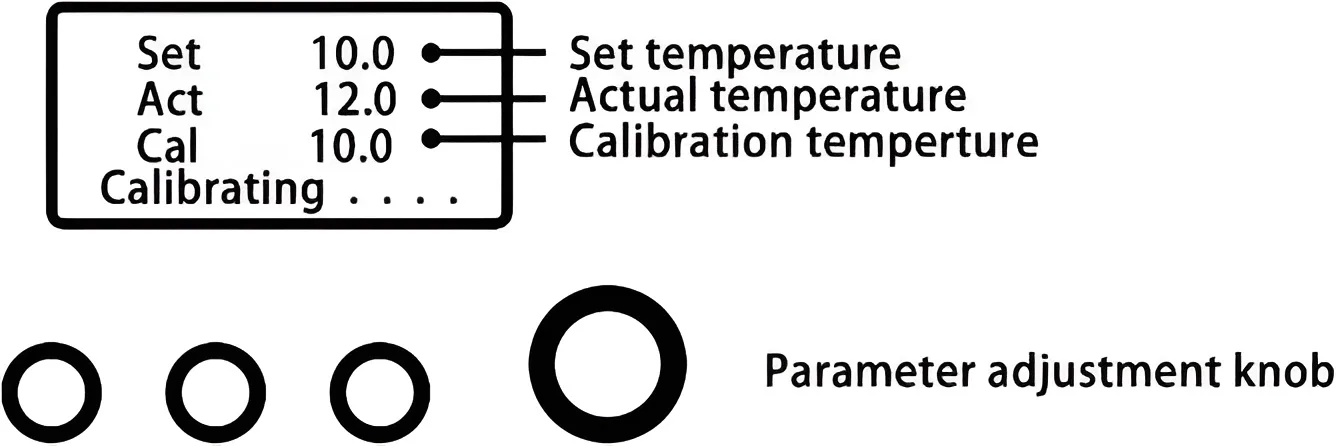
2. Rotate the parameter adjustment knob to set target temperature for calibration. Press the parameter adjustment knob and confirm the set values.
3. If the actual temp. reaches the set temperature and remains 20min-30min,and other blocks will be stable after 5min), The calibration area will display the corresponding temperature on display.
Record the measurement on a Thermometer, rotate the parameter knob to adjustthe calibration Temp. to actual thermometer temp. value (Calibration temp. adjustment range is Set temp±5℃) and press the same knob to confirm settings.
4. To ensure the calibration temperature adjustment set correctly, press the push knob and the instrument will enter the second calibration temperature, repeat step 3, after the third temperature calibration completed, the screen displays “Calibration Success” on interface and the instrument will automatically enter into the self- check mode. Then calibration is complete.
If the display screen shows the “Cali Failed” interface, the input value of calibration may be wrong. Hence restart the instrument and repeat the calibration steps again.
Parameter Setting Methods
1.Respectively, press the function button, the corresponding characters of the setting area are flashing.
2.Rotate parameter knob, input the target parameters.
3.Wait 3s, the corresponding character will stop blinking, complete parameter setting.
Note: When the machine is turned on, the setting area of the screen will display the parameters of the last operation. When the time is adjusted to 00:00, it means that the product will run in continuous mode.
Running
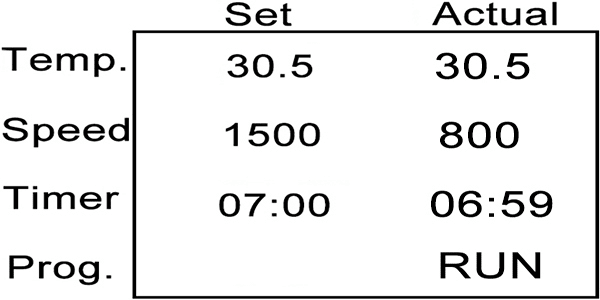
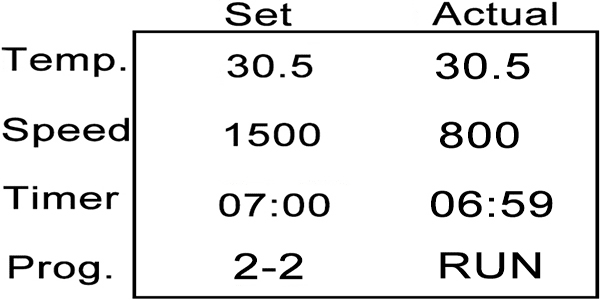
Single Step Work Without Saving
When power on, the screen shows the parameters of the last run, or factory settings. Push the Temp, Speed, Time button respectively, the corresponding characters will flash. Rotate the Adjustable knob to set the parameters. If time is set to 00:00, it means continuous working mode. After the setting completed, push the adjustable knob to start work. Refer to below figure.
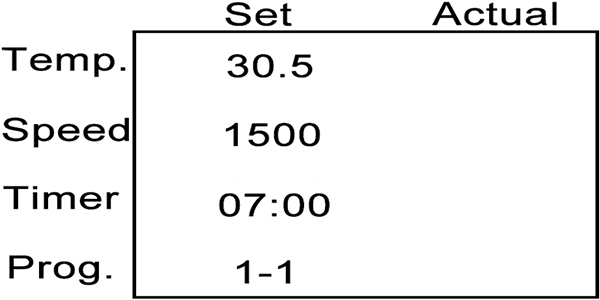
Multiple Step Work without Saving
The program set in the single step is the first step by default. Refer to below figure.
2.Push the Prog. button, start to set the second step. The last line of in the Set column shows 1- 2 now. Refer to below figure.
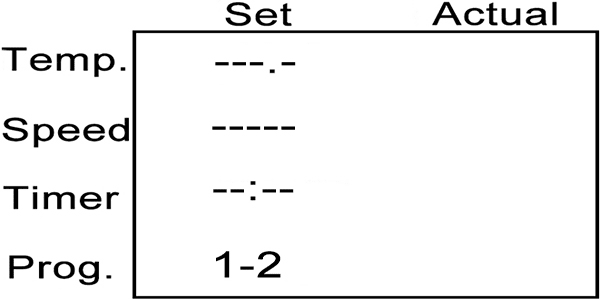
Note: Before the setting of the second step complete, system consider there is only one step by default. But after the setting complete, the actual steps will be shown correctly. Refer to below figure.
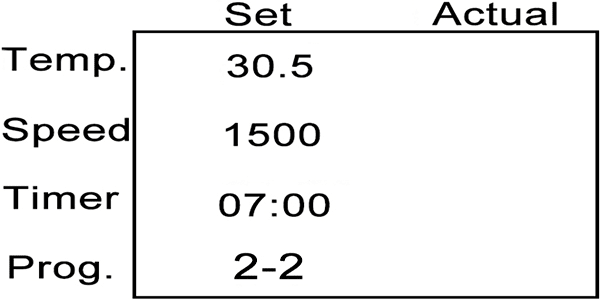
3.In the same way, complete the later steps. Then push the adjustable knob to start work. Refer to below figure.
Prog. shows the program and step number. Refer to the figure, there are 2 steps totally, now it’s the second step.
Note: Before the time is set, the step will not take effect. If set time to 00:00, it means continuous working mode. Before completing the setting for the current step, can’t enter next step.
Program with Saving Mode
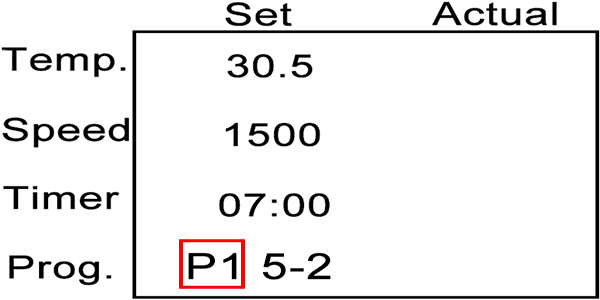
Programming method is similar with Multiple Step without Saving mode. After the programming complete, long push the adjustable knob, program name characters flash (refer to the red part in below figure). Rotate the Adjustable knob to input the number of the name, then push the adjustable knob to complete the input. The program saving is complete now.
Prog. shows P1, 5-2,means the program and step number. Refer to the figure, there are 5 steps totally, now it’s the second step.
FAQ
Modules can be quickly swapped without tools, thanks to a magnetic design. The precision-machined interface between the module and the main unit ensures a tight fit after replacement, ensuring consistent temperature control every time.
1. The temperature of the instrument had been calibrated before delivery, but due to some other factors the temperature may vary from the actual temperature and the deviation can be corrected by temperature calibration.
2. In order to ensure the temperature control accuracy, based on the temperature calibration function, it is recommended to calibrate the temperature whenever the heating block is changed.
It is recommended to disconnect the power supply when not in use for a long time (more than 1 week) to avoid standby power consumption; the storage environment should be dry and ventilated, the temperature should be maintained at 0-40℃, the relative humidity should be ≤80%, and avoid direct sunlight or proximity to heat and water sources.
1.Proper maintenance can keep instruments working properly and lengthen its lifetime.
2.Do not spray cleanser into the instrument when cleaning.
3.Unplug the power line when cleaning.
4.Wear the proper protective gloves during cleaning of the instrument.
Reviews (0)
Be the first to review “Reliable Digital Thermal Mixer for Clinical and Research Labs”
You must be logged in to post a review.
Related products
Reviews
There are no reviews yet.