


Professional Iridology Digital Camera Multifunction 12MP Camera Eye Iris Scanner
Price range: $439.00 through $469.00 USD
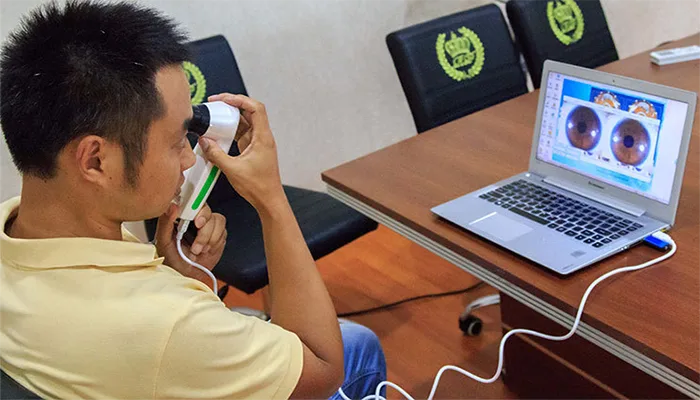
This iridology camera analyzes iris features to reveal overall health and potential health issues. Equipped with a 12-megapixel high-definition CCD sensor, LED surround lighting, and adjustable focus, it accurately captures iris texture and provides clear, precise images. Plug-and-play operation requires no power, and the handle adjusts light and focus with a single button for easy operation. Built-in intelligent software archives patient information and photos and supports report printing. Suitable for medical assistance, health product stores, and personal health management organizations, it provides one-stop health and iris screening analysis reports, allowing you to intuitively understand various potential health signals.
Description
Specification
| Type | 9822U |
| Size | 33×28×12cm/ 13×11×4.7inches |
| Weight | 1.8kg |
| Pixel | 12 million |
| Maximum Resolution | 3840×2880 |
| USB interface | USB2.0 interface |
| Supported operating systems | All systems |
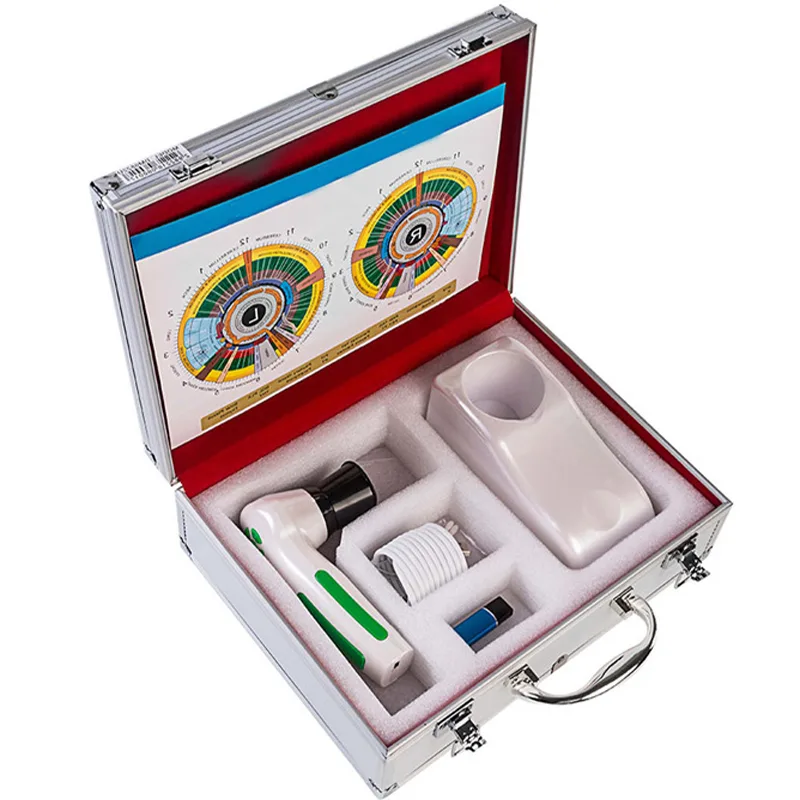
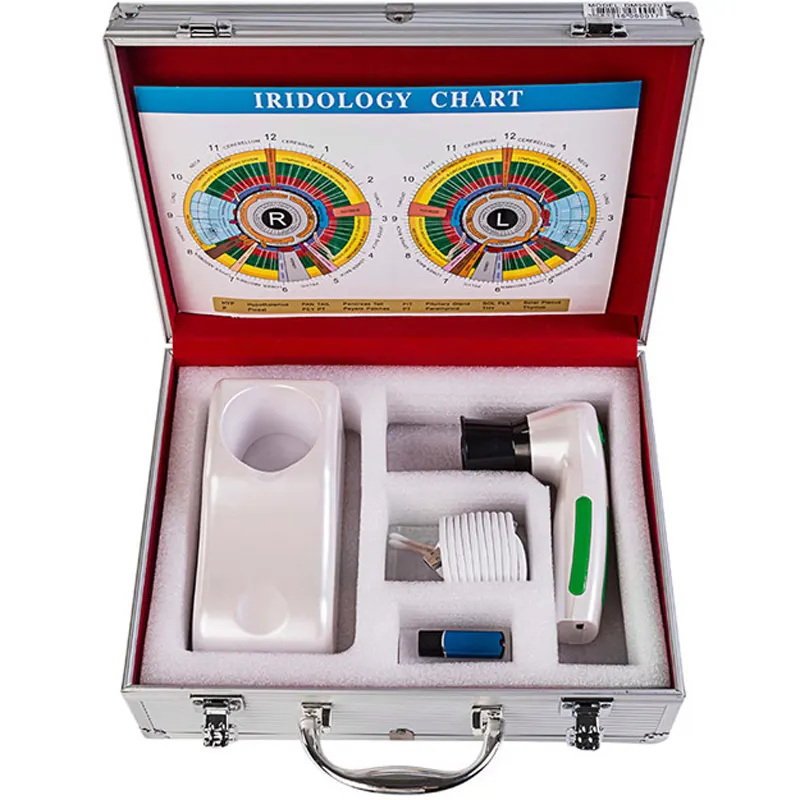
Packing List
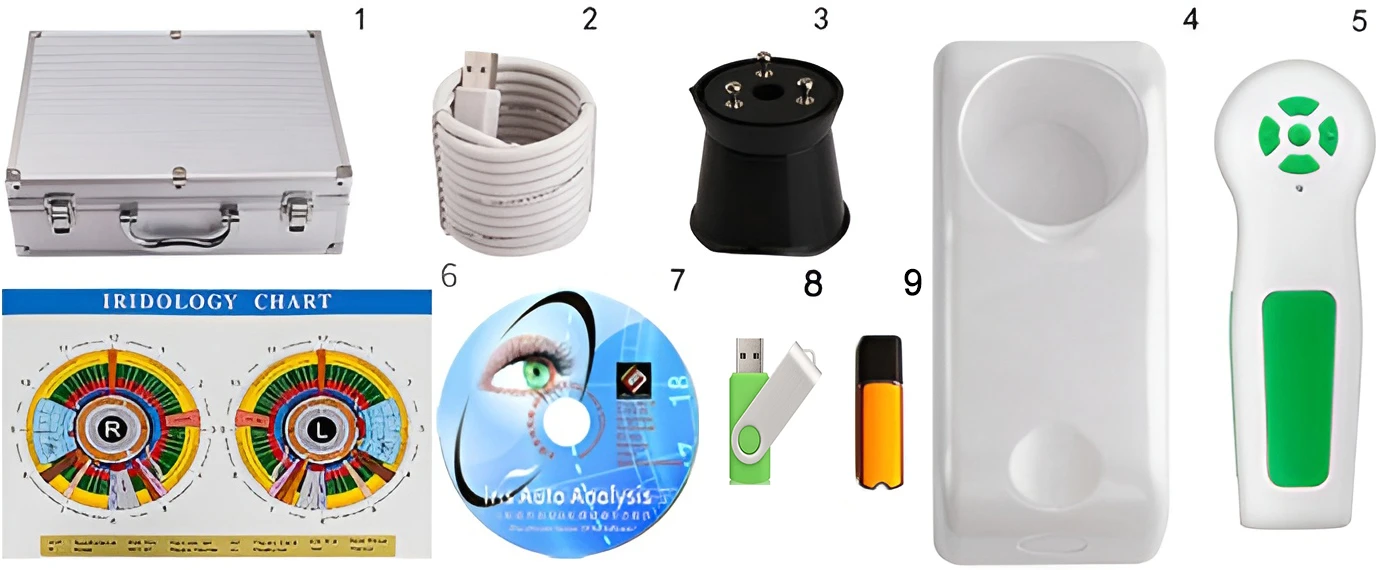
1. Aluminum Box 2. USB Line 3.Iris Shots 4.Instrument Base 5. Instrument Handle 6. Iridology Chart 7.Iridology Software 8.U Disk 9.Dongle
Product Features
12 Million High-definition Pixels
The 12-megapixel resolution provides the iris camera with high-definition imaging capabilities, which can delicately capture tiny features such as iris texture, providing a clear and reliable image foundation for accurate detection and analysis.
Autofocus
The iris camera’s autofocus function can quickly and accurately lock onto the detection target and clearly capture the detailed features of the iris without manual adjustment, ensuring clear and stable imaging, improving detection efficiency and result accuracy.
High Accuracy
During the detection process, it has excellent accuracy and detail capture capabilities. It can not only accurately lock detection targets such as irises, but also clearly present subtle features such as texture and structure, reducing errors and ensuring the reliability of detection results and the accuracy of analysis.

Supports All Systems
The professional iris software equipped in the iris camera is compatible with all systems and can adapt to the computer equipment of different users.

Professional Iris Screening
Professional iris screening can accurately analyze iris image data captured by the camera, complete health assessment tasks, and support customer information management, report generation and printing, ensuring that users can provide convenient and efficient testing services in various working environments.
Product Dtail
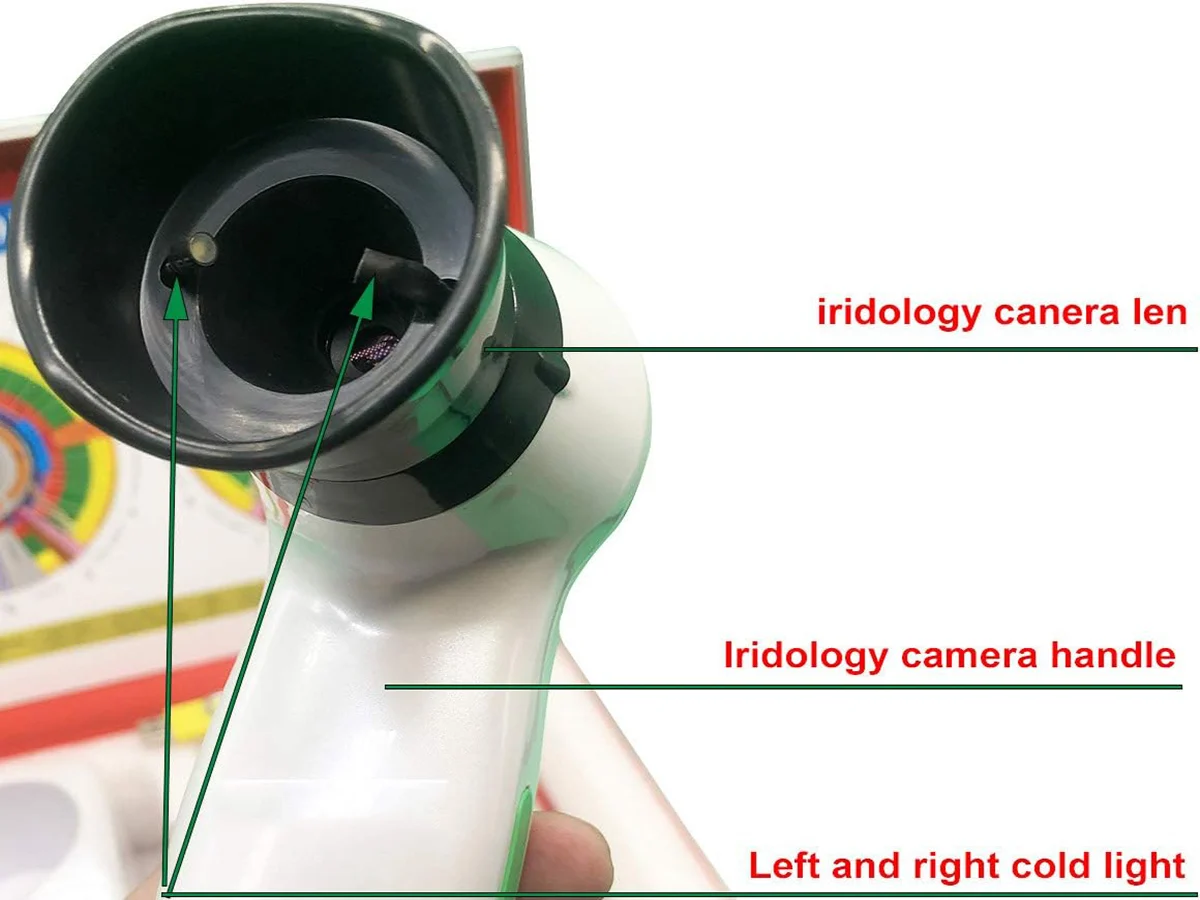
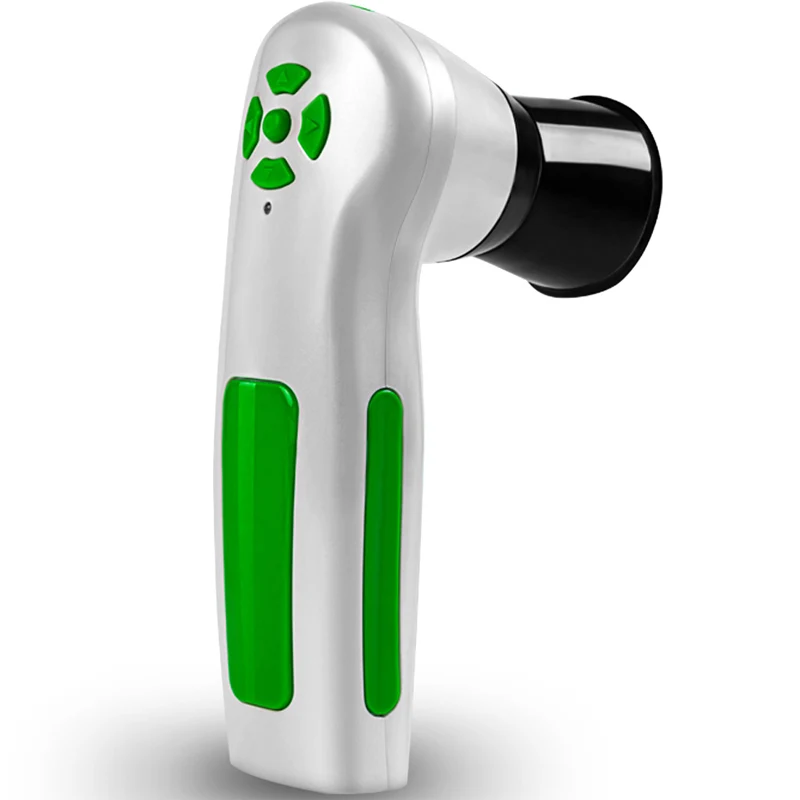
Lens
The iridology camera lens is equipped with high-resolution optical components and uses coating technology to reduce light reflection and stray light interference. It can accurately capture subtle features such as iris texture. It also supports flexible adjustment of the amount of light entering and can output clear and sharp images in different lighting environments, providing stable hardware support for iris information collection and analysis.
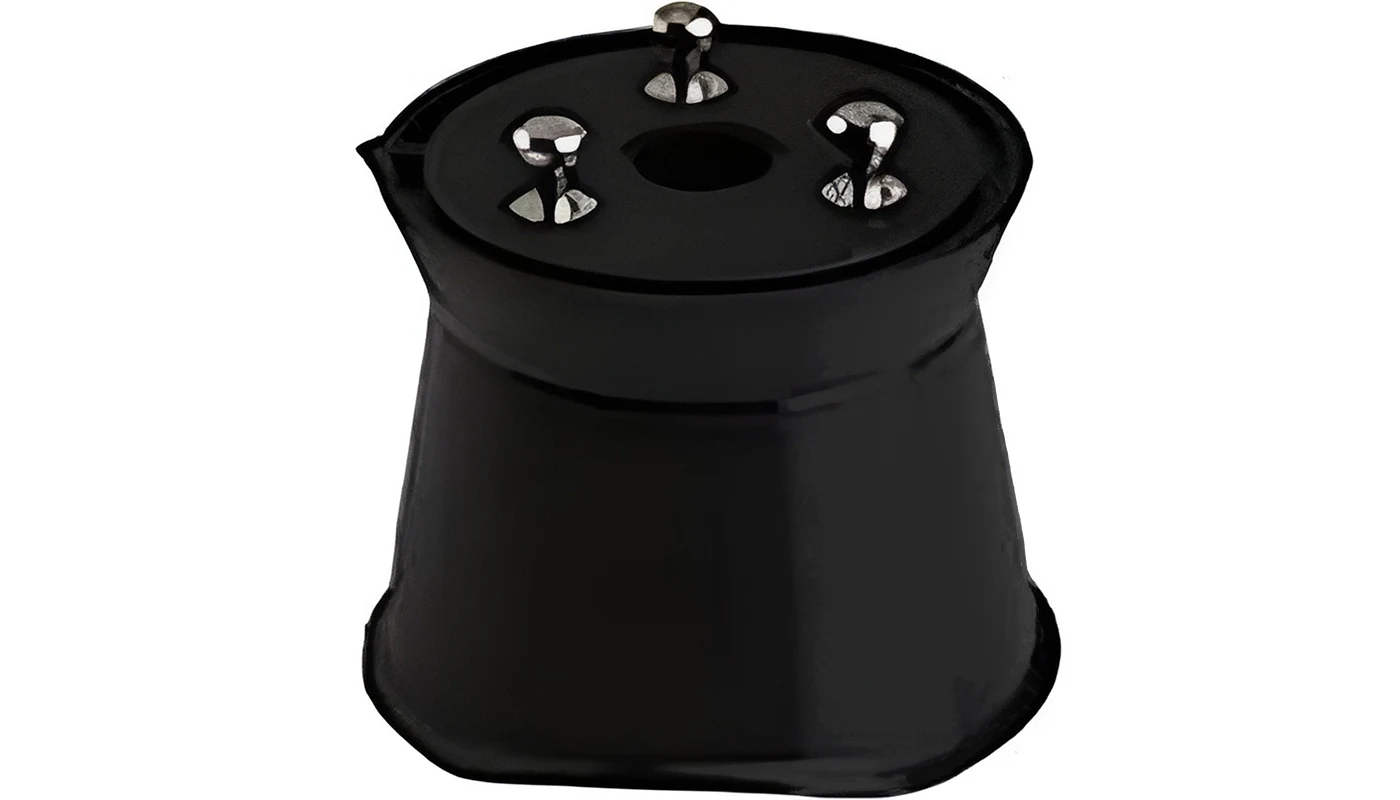
Easy Lens Installation
The iris camera lens is easy to install, lowering the operational threshold. Users can quickly complete assembly without complicated steps, saving equipment preparation time and ensuring efficient start of inspection work.
USB Interface
The USB2.0 interface provides a stable, high-speed data transmission channel for the iris camera, enabling quick connection to computer devices, ensuring smooth image acquisition and data interaction, and facilitating efficient detection processes.
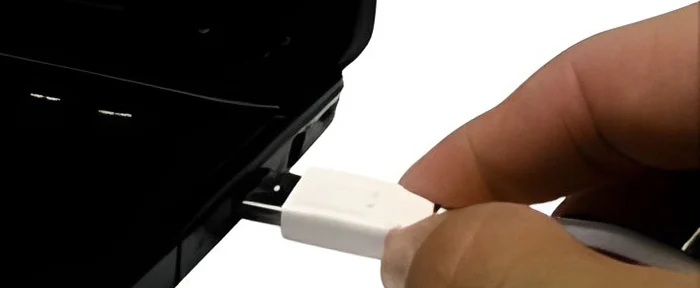
Can be Connected to a Computer
It can be connected to a computer to achieve real-time transmission of inspection images and data synchronization, and can be used with professional software to complete analysis, storage and report generation, making the inspection process more convenient and efficient.
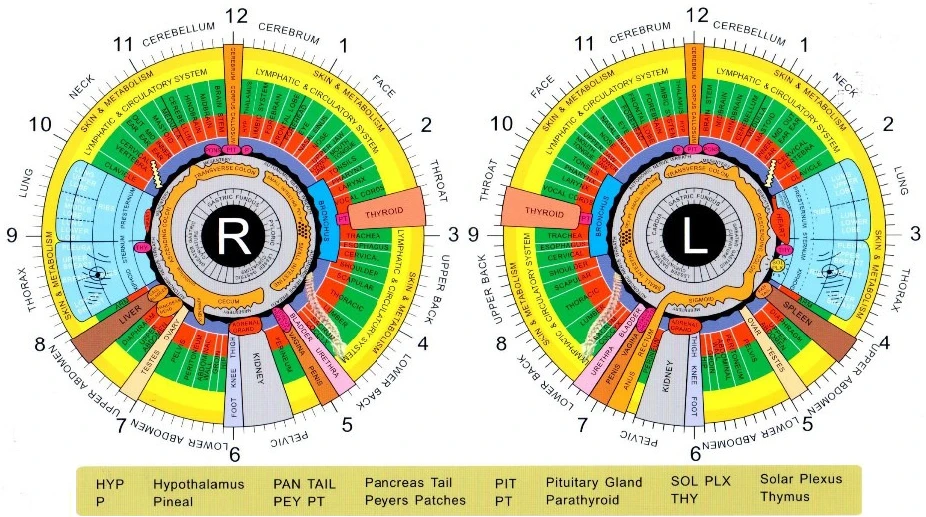
Iridology Chart
Iridology charts can help users compare and interpret iris features and health-related information, provide intuitive reference for detection and analysis, and improve the efficiency of understanding iris detection results.
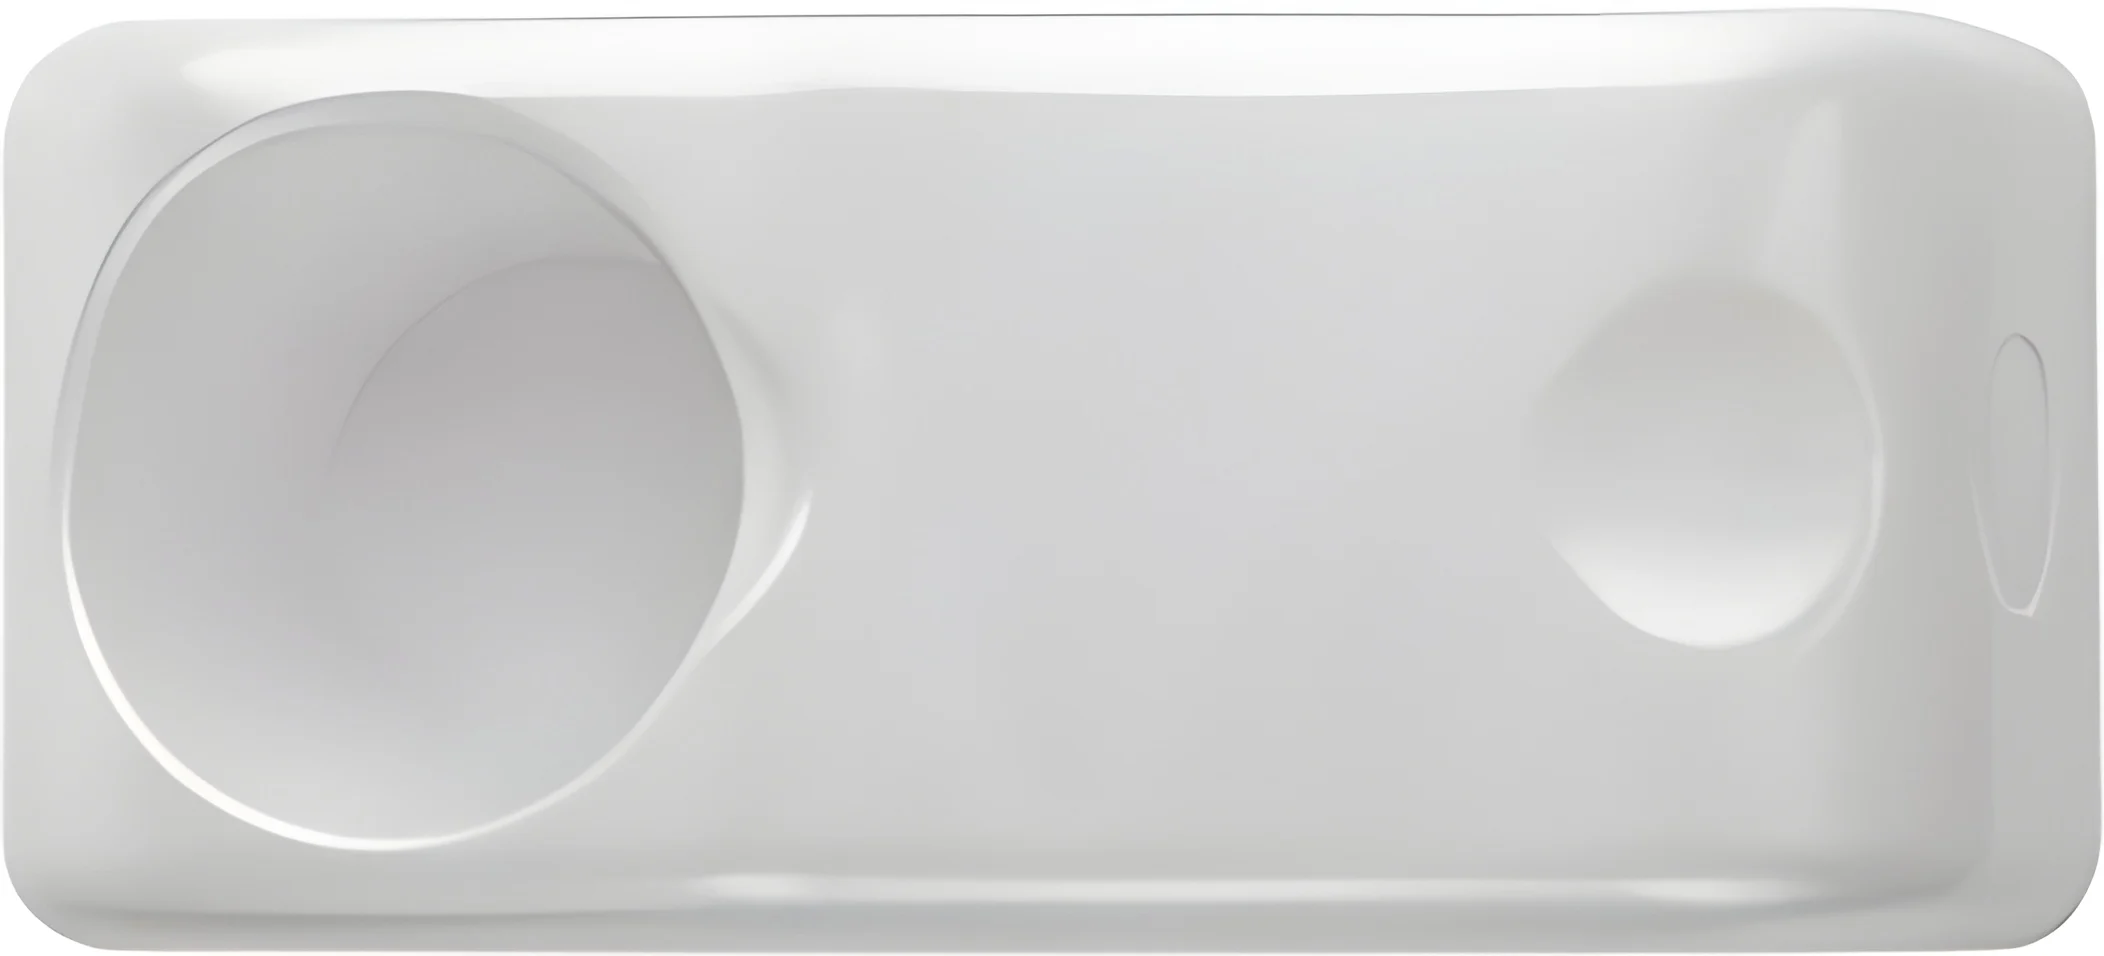
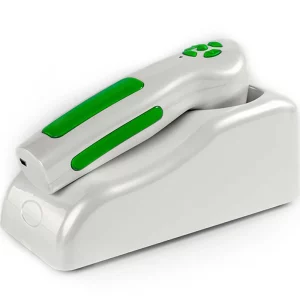
Instrument Base
This iris camera base can hold the camera firmly and easily for easy access, preventing it from being lost or damaged due to random placement. It can also be stored in an orderly manner when not in use, keeping the desktop tidy and protecting the camera from damage such as collisions to a certain extent.
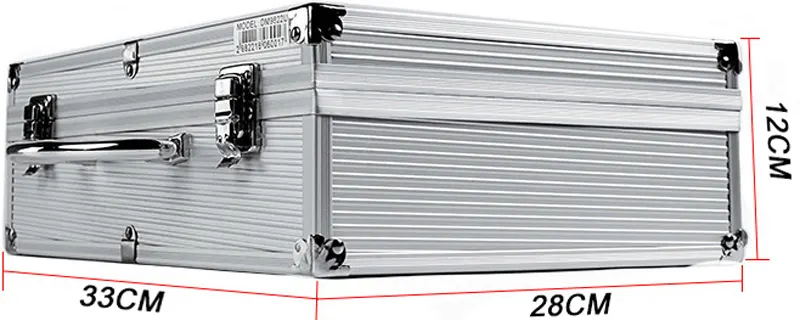
Aluminum Box
The size of the aluminum box is suitable for storing the iris camera. It can tightly wrap the device to reduce shaking, making it convenient to carry and store. It provides safe protection for the iris camera and accessories and improves the mobility of the device.
Application Industries

Medical Assistance
In the medical assistance category, primary care and physical examination institutions use iris images to assist doctors in preliminary screening for health risks and provide reference direction for subsequent diagnosis and treatment (it does not replace professional medical diagnosis).

Health Club
In the health management category, iris detectors capture information such as iris texture and color to assist in analyzing the body’s potential health trends, providing a basis for customizing diet, work and rest schedules and other health conditioning plans.

Retail Services
In the retail service category, the health care product industry uses it to present customers’ nutritional absorption and organ function status, accurately recommending suitable products to enhance trust and promote sales.

Sports and Fitness
When it comes to sports and fitness, it can assist in assessing members’ physical foundations such as physical reserves and recovery capabilities, and help coaches customize exclusive fitness plans that include exercise intensity, project matching, and nutritional recommendations to improve results and reduce the risk of injury.
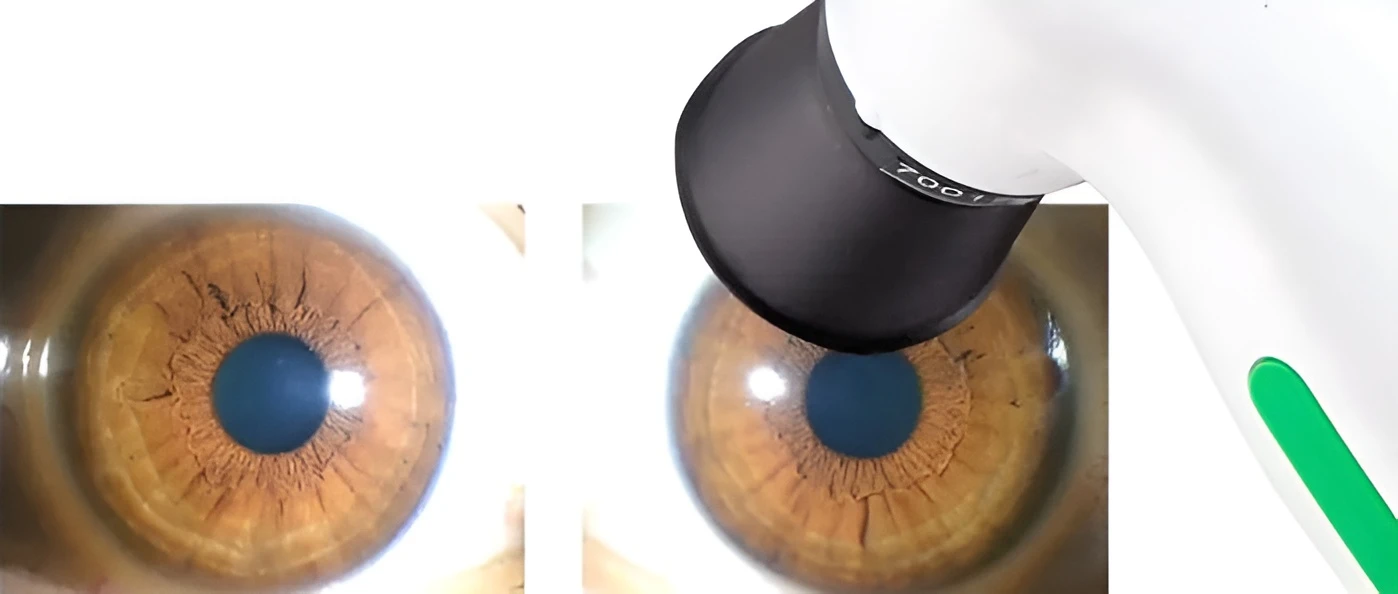
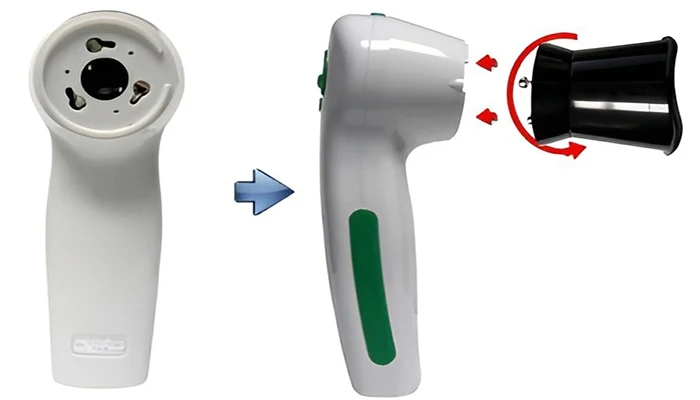
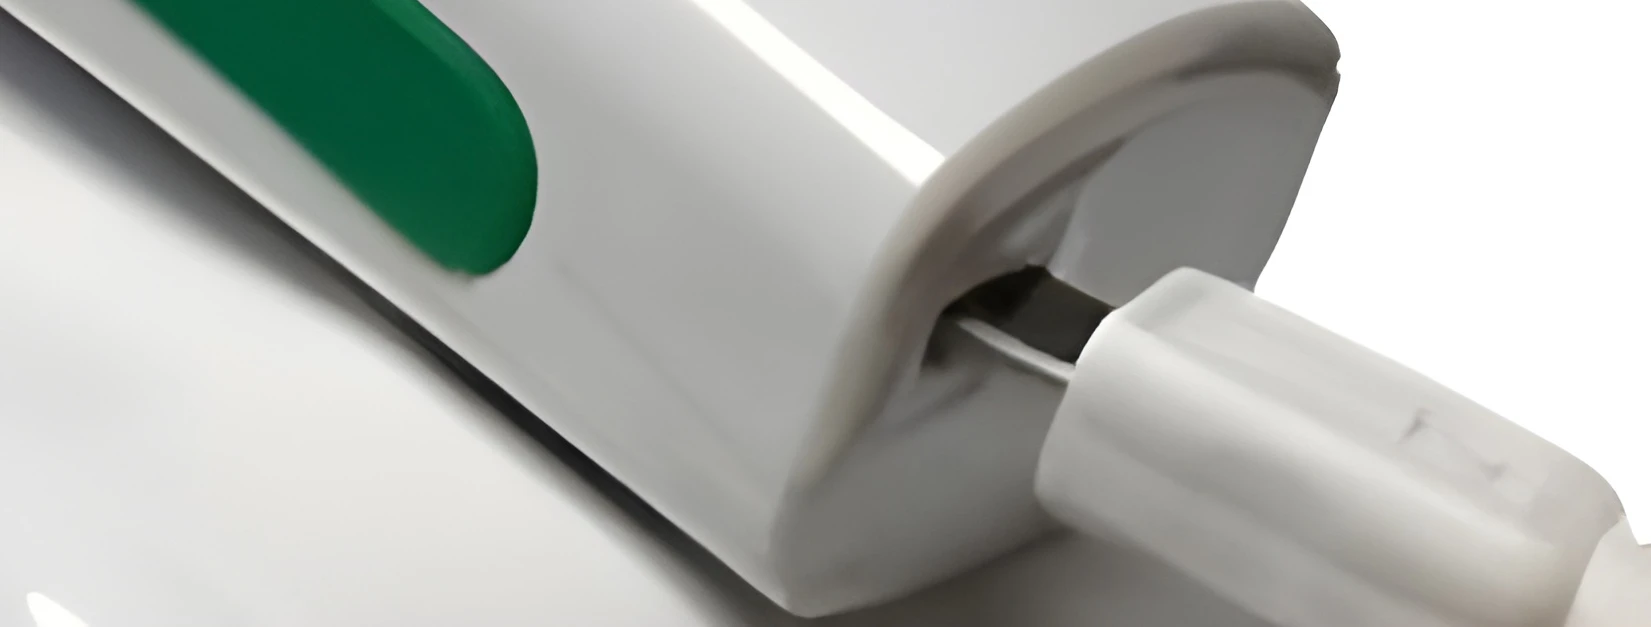
Handle Assembly
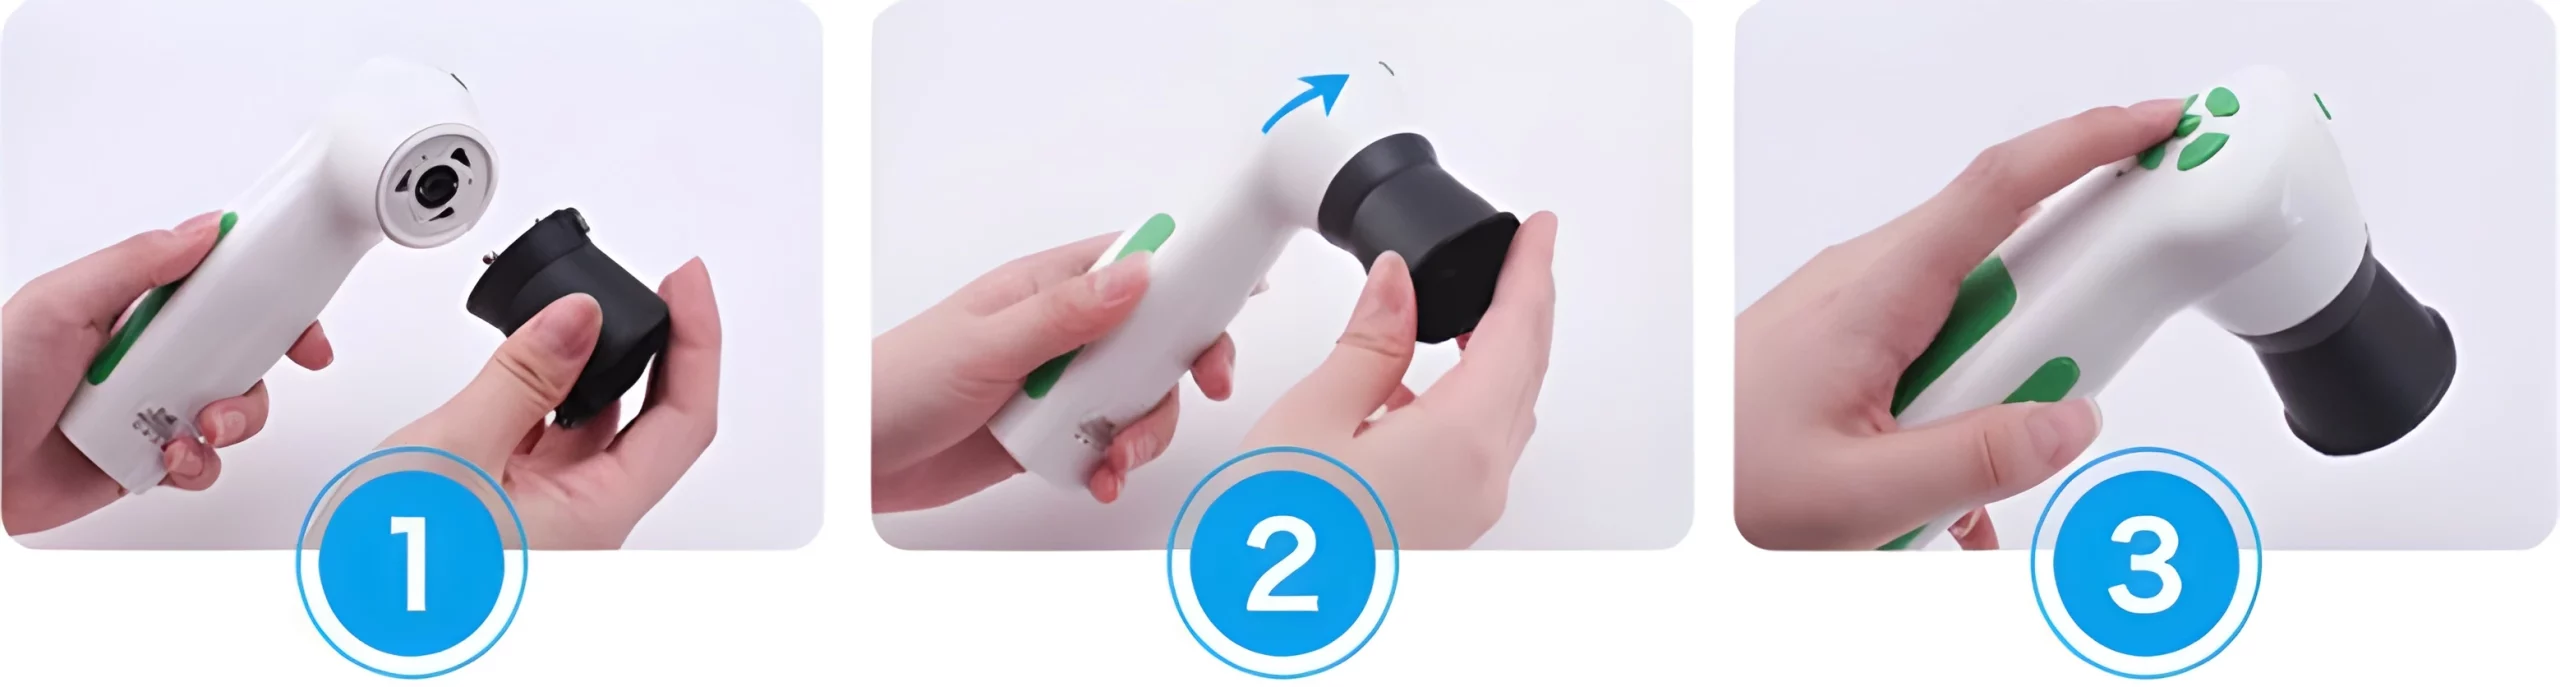
1. Align the handle with the black part (Figure 1).
2. Push in the direction of the arrow to complete the insertion (Figure 2).
3. Press the green button to confirm installation (Figure 3).
CV Advance Iris Analysis System Installation
Insert the installation cd into the cd rom. Then double click the installation program CVAdvance.exe inside the cd rom and follow the instruction below.
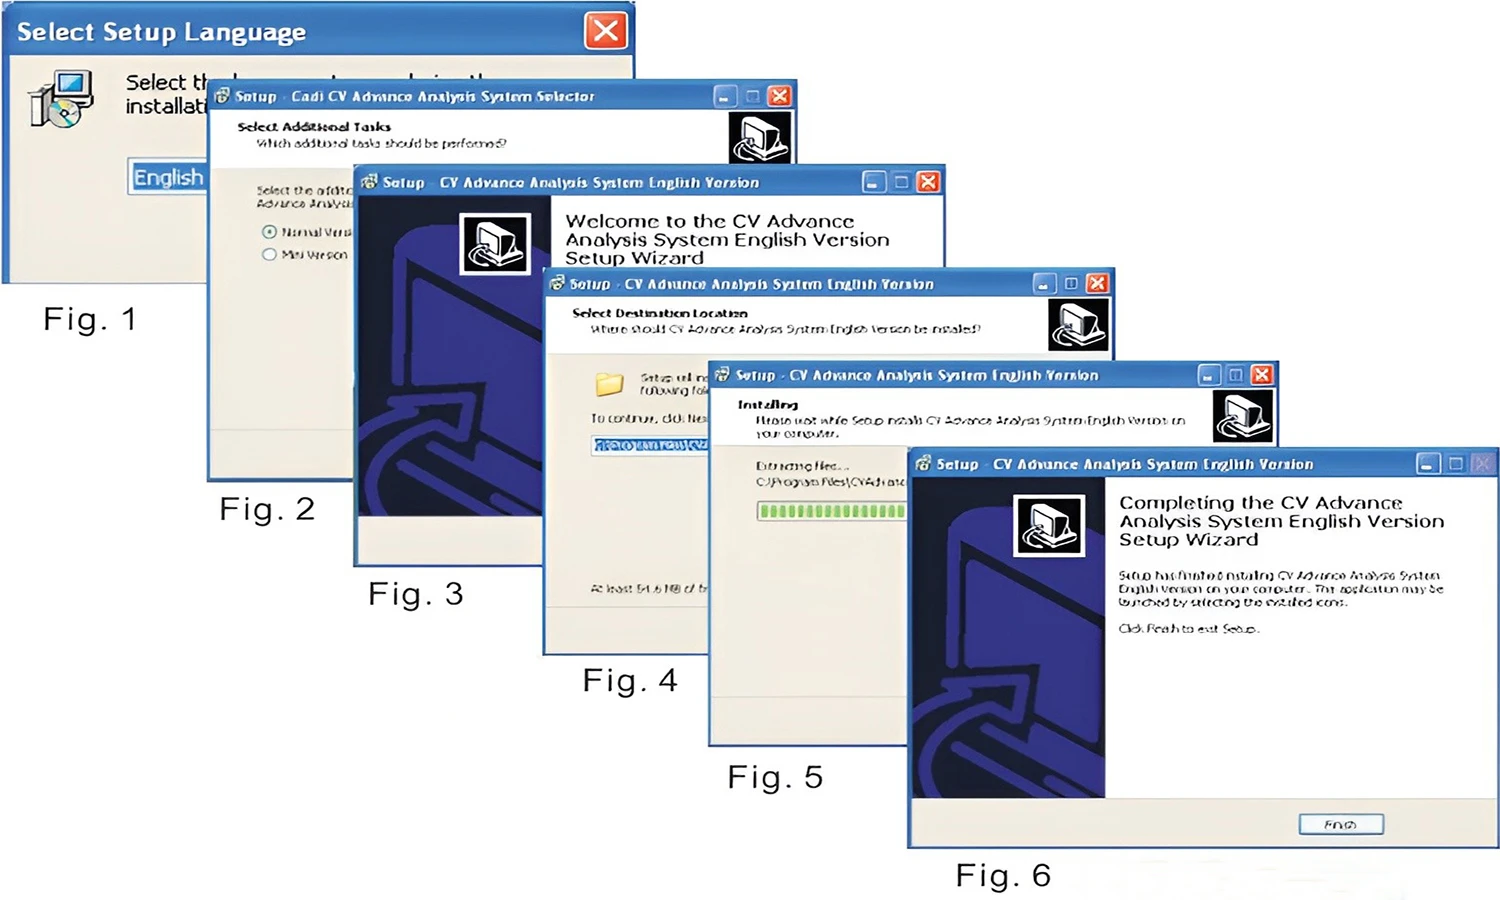
Step 1: Select install language
Step 2: Select install version
①.Normal Standard PC
②.Mini Net book PC
Step 3: Follow the installation interface and click “Install”. Click “Next to complete the installation.
Using the CV Advance Iris Analysis System
1. Login the CV Advance Iridology Analysis System.
2. Select the iridology device model.
3. Create client information.
4. Capture left and right iris images.
5. Set up device parameter.
6. Analysis left and right iris.
7. Save and print report.
Tips: Before using the iridology analysis system, please make sure the dongle and the device are connected properly to the PC. Otherwise, the analysis system could not run and recognize the device.
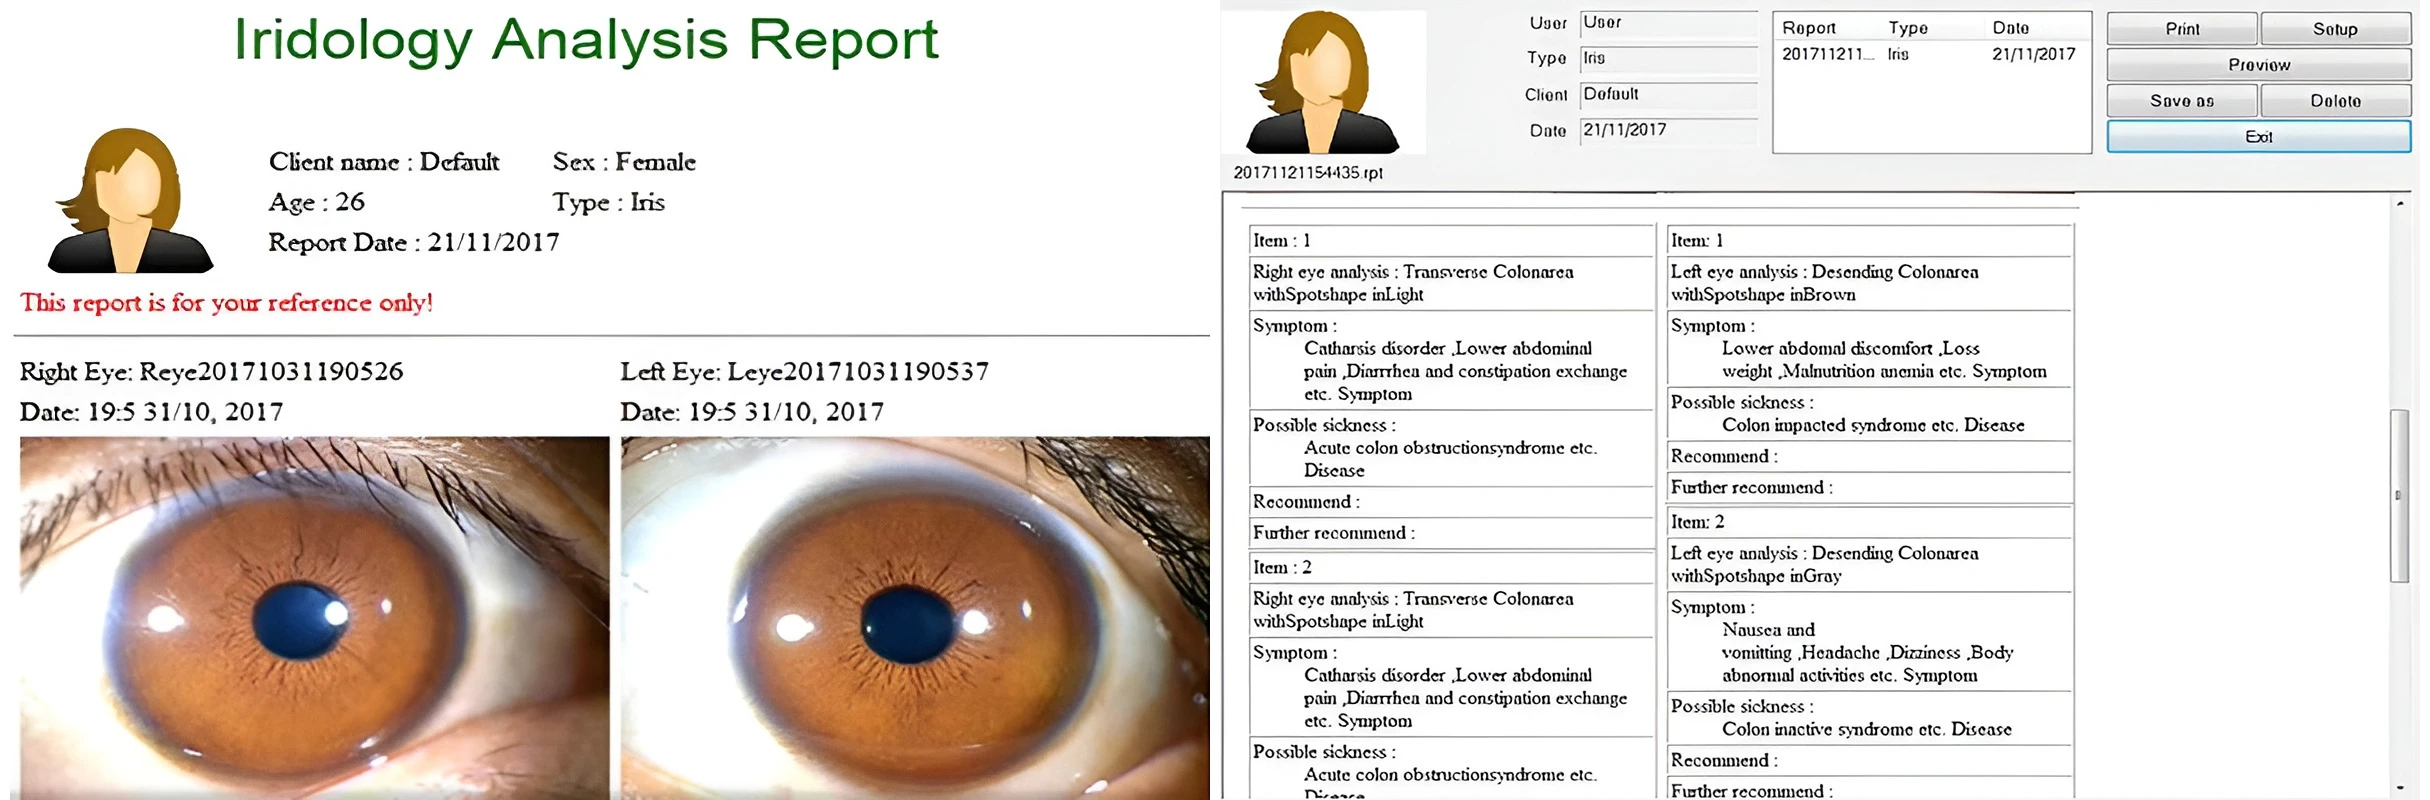
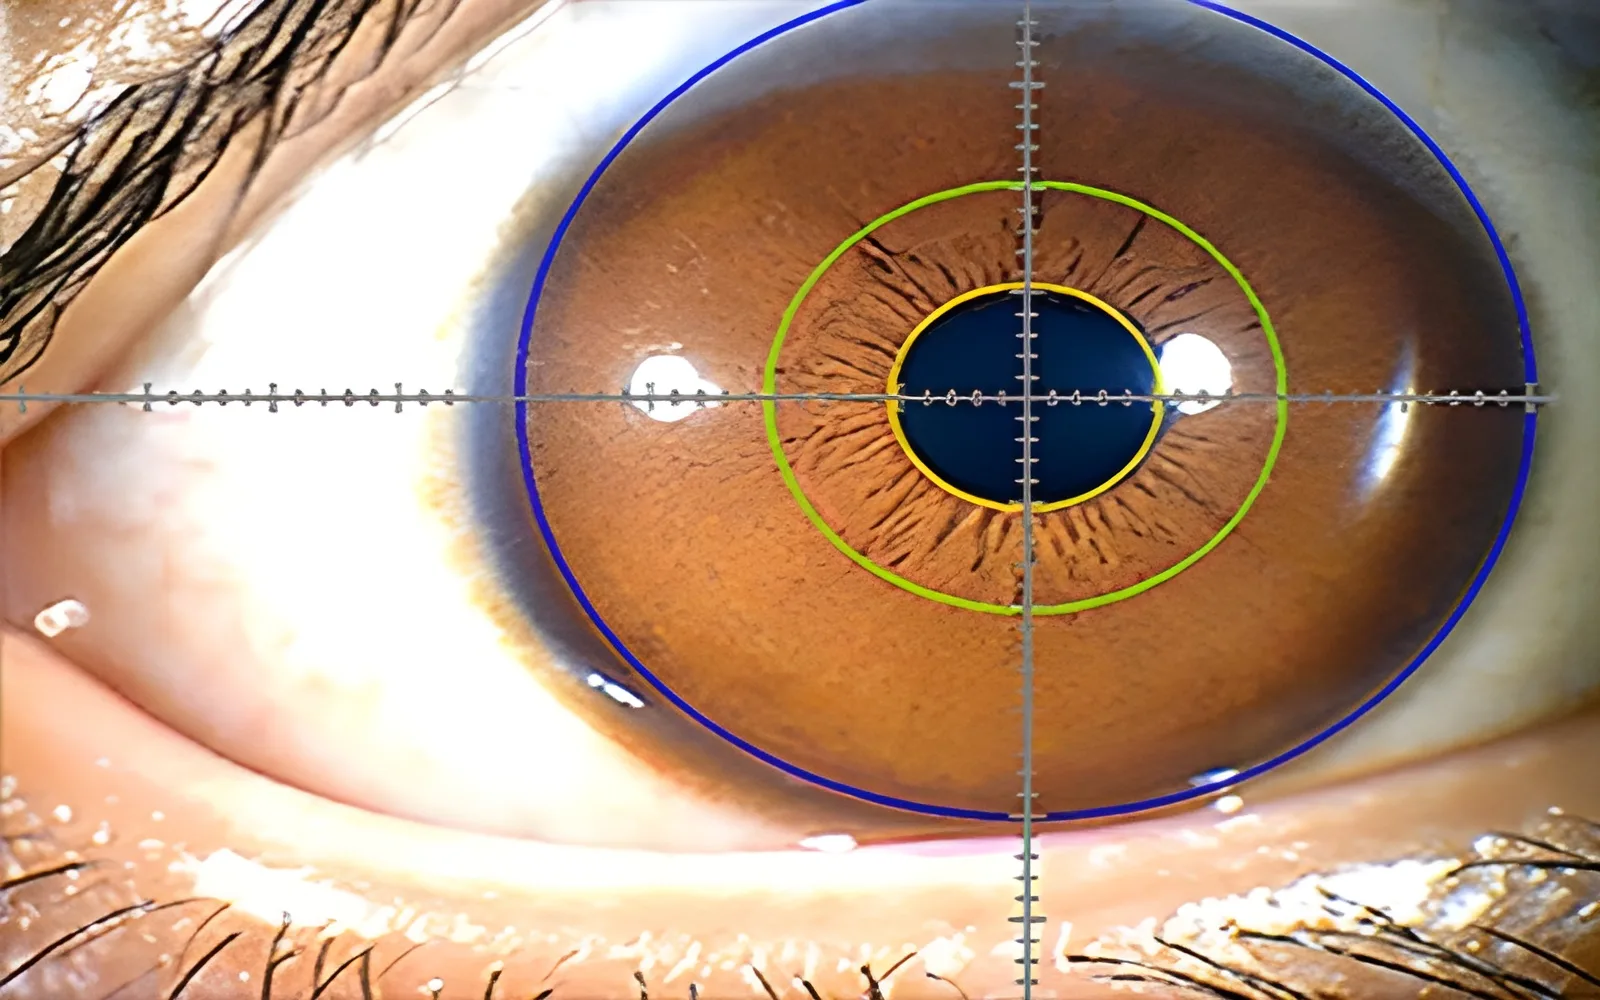
Analytical Report
The iridology camera captures the iris features and generates an analysis report. The report presents information on potential symptoms detected, providing an intuitive reference for health assessments, conditioning recommendations, etc.
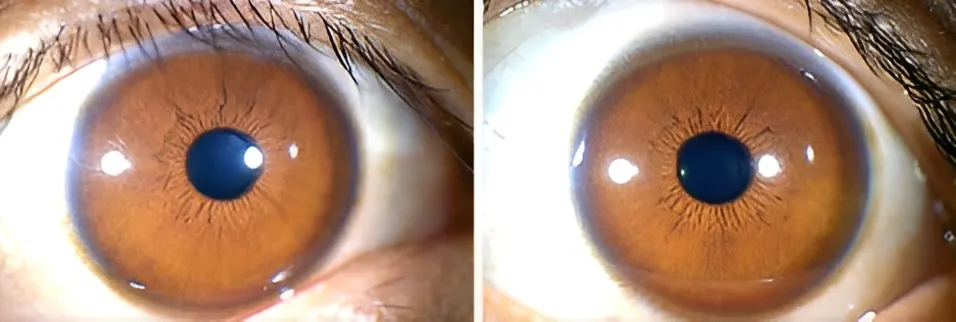
Practical Application
FAQ
Taking high-quality iris photos is crucial for accurate analysis. Here’s how to get the best results with our iridometers:
1. Ensure adequate lighting. Use the iridometer’s built-in LED lighting. Adjust the brightness for optimal clarity and avoid overexposure.
2. Focus precisely. Use an adjustable focus lens to focus on the iris. Ensure the pupil is centered in the frame.
3. Keep your hand steady. If necessary, use a tripod or stand to minimize hand shake during the photo.
4. Position the eye correctly. Ask the subject to look directly into the lens with their eyes open.
5. Check and retake the photo if necessary. After taking the photo, check for clarity and alignment. Retake the photo if necessary to ensure optimal quality.
The dongle in the iris camera verifies the user’s legal right to use the software by storing software licenses and authorization information to prevent piracy. At the same time, it encrypts key codes and securely stores sensitive data, has anti-cracking capabilities, and ensures the safe operation of the software and authorization specifications.
When the device is not in use, it is recommended to place it in a dry, ventilated environment, away from direct sunlight and humid environments. You can put the device back into the matching storage box to prevent dust accumulation and extend the service life of the device.
Try to avoid excessive eye fatigue and keep your eyes clean before the test.
The test can be performed normally when wearing ordinary contact lenses, but if you are wearing colored decorative contact lenses, it is recommended to remove them in advance to avoid blocking the iris texture and affecting the accuracy of the test.
When cleaning the lens, first use a soft dry cloth or cotton swab to gently wipe off the surface dust. If there are stains, dip a small amount of clean water or a special lens cleaner and gently wipe it in one direction with the lens cloth. Be careful not to use irritating liquids such as alcohol, and avoid pressing the lens hard.
Reviews (0)
Be the first to review “Professional Iridology Digital Camera Multifunction 12MP Camera Eye Iris Scanner”
You must be logged in to post a review.
Related products
Reviews
There are no reviews yet.